How to Organize Deep Kitchen Cabinets Without Losing Items in the Back: Smart Solutions for Hidden Storage
You reach into your deep cabinet, fingers searching blindly for that one pan you know is back there—only to knock over three others and still come up empty-handed.
It’s a scene that plays out in kitchens everywhere. Deep cabinets seem like a gift of storage space, but they quickly become black holes where items go to disappear forever. You buy duplicates of spices you already own. You forget about that extra bag of flour until it expires. You waste precious minutes hunting for tools you know are somewhere in that abyss. The problem isn’t your cabinet—it’s the lack of a system to make the depth work for you instead of against you.
TL;DR:
- The Problem: Deep cabinets hide items in the back, leading to forgotten food, duplicate purchases, and daily frustration.
- The Solution: Use pull-out shelves, lazy Susans, tiered risers, and clear containers to bring items forward and keep them visible.
- The Strategy: Group by category, store heavy items on lower shelves, use vertical space, and maintain with a weekly 5-minute reset.
Key Takeaways
- Visibility is everything. You can’t use what you can’t see. Pull-out shelves and tiered risers bring the back of the cabinet to you .
- Group items by frequency of use. Everyday items go in the front, rarely used items go in the back—or better yet, in a different cabinet .
- Use the “first in, first out” rule. Place newer items behind older ones so you use up what you already have before it expires .
- Invest in the right hardware. For heavy items like cast iron, choose sturdy slides with high weight capacity to prevent bending and failure .
- Maintenance is easier than a full overhaul. A few minutes each week keeps the system working.
Why Deep Cabinets Become Storage Nightmares
The root cause is simple: depth. When a cabinet is 24 inches deep, the back six inches are completely invisible unless you get down on your hands and knees and peer inside. Items get pushed back and forgotten. Out of sight, out of mind—until you’re desperately searching for something and realize it’s been hiding back there for months.
“Most kitchen problems come from small maintenance habits that are often ignored.”
Another issue is stacking. People stack pots inside each other, then stack pans on top, then stack lids sideways. The result is a clattering mess where you have to remove five items just to reach the one you need. And when you put things back, you just shove them wherever they fit, making the problem worse.
Step-by-Step Guide to Conquering Deep Cabinets
Step 1: Empty, Declutter, and Clean
This is the hardest part, but it’s essential. Take everything out of the cabinet and put it on your counter. Sort items into three piles:
- Keep: Items you use at least once a month.
- Relocate: Items that belong in a different cabinet (like serving dishes you only use for holidays).
- Donate or Toss: Duplicates, broken items, rusted tools, and things you haven’t touched in over a year.
Be ruthless. If you have three rolling pins and only use one, give the extras away. If you bought a specialty pan for a recipe you made once five years ago, it’s time to let it go. A smaller collection of useful items is much easier to organize than a cabinet full of clutter.
Wipe down the interior of the cabinet with a damp cloth. Check for crumbs, spills, or signs of pests. This is also a good time to look for any water damage or loose shelving.
Step 2: Measure Everything Before Buying Organizers
This step saves you from wasting money on organizers that don’t fit. Measure:
- Width (left to right inside the cabinet)
- Depth (front to back)
- Height (top to bottom)
Take note of any obstructions like center stiles (the vertical piece in the middle of double-door cabinets) that might block a pull-out shelf from sliding out fully .
Step 3: Choose the Right Organizers for Your Needs
Here are the best tools for taming deep cabinets, listed from simplest to most impactful.
Option A: Pull-Out Shelves (The Ultimate Solution)
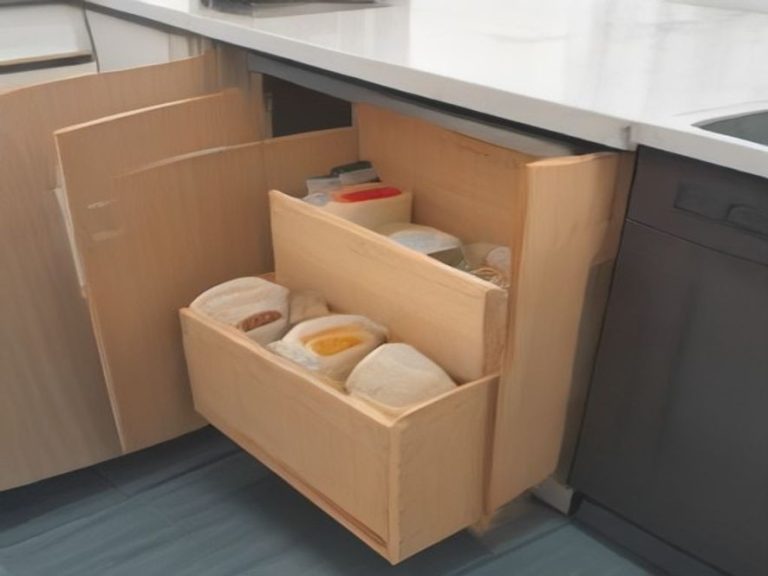
Pull-out shelves are platforms mounted on drawer slides that roll forward, bringing the entire cabinet depth to you . This is the single most effective fix for deep cabinets.
Why they work: You never have to reach into the back of a cabinet again. Everything is visible and accessible. Heavy items like cast iron skillets are easier to lift when they’re right in front of you.
Installation choices:
- No-drill adhesive trays: Stick to the cabinet floor. Good for lightweight items. Cost: $20-$50.
- DIY custom shelves: Buy drawer slides and build your own shelves. Cost: $50-$100 plus tools.
- Professional custom systems: Built to your exact dimensions with heavy-duty slides. Cost: $100-$500+.
Pro tip: Choose full-extension slides so the shelf comes all the way out, not just partially .
Option B: Lazy Susans and Turntables
For deep corner cabinets or standard shelves, a lazy Susan spins to bring items from the back to the front. You can get single-tier or two-tier versions.
Why they work: A quick spin shows you everything on the shelf. They’re great for canned goods, spices, and small jars.
The catch: They waste space because they need clearance to rotate. They also can tip if you spin them too fast with heavy items.
Cost: $15-$50
Option C: Tiered Shelf Risers
These create two or three levels on a single shelf. Items in the back become visible at a higher elevation.
Why they work: You can see everything at a glance. They’re perfect for cans, spices, and small jars.
The catch: They don’t extend all the way to the back of the cabinet. You might still have a small dark zone at the very rear.
Cost: $10-$30
Option D: Clear Containers with Labels
Transfer pantry items like flour, sugar, rice, pasta, and snacks into clear, airtight containers. Label each container with the contents and expiration date .
Why they work: You can see exactly what you have without opening anything. Uniform shapes stack neatly. Airtight containers keep pests out and food fresh longer.
The catch: It takes time and money to buy all the containers. Start with your most-used items and expand gradually.
Cost: $5-$20 per container
Option E: Door-Mounted Racks
Use the inside of the cabinet door for extra storage. Small racks hold spices, oils, or pot lids.
Why they work: They use vertical space that’s otherwise wasted.
The catch: Make sure the rack doesn’t hit the shelves when the door closes. Check the weight capacity before loading heavy items.
Cost: $10-$30
Step 4: Group Items by Category and Frequency
Now that you have your organizers, decide what goes where. Group items by how you use them.
Baking station:
- Flour, sugar, baking powder, baking soda, cocoa powder
- Mixing bowls, measuring cups, measuring spoons
- Baking sheets, cooling racks, parchment paper
- Stand mixer (if it fits)
Cooking station:
- Pots, pans, skillets
- Spatulas, tongs, ladles, wooden spoons
- Cooking oils, vinegars, cooking sprays
- Salt, pepper, and daily-use spices
Food storage station:
- Food containers with their lids (keep lids attached or stored together)
- Plastic wrap, foil, parchment paper, baggies
Frequency rule:
- Items you use daily go at the front or on an easy-to-reach shelf
- Items you use weekly go in the middle
- Items you use occasionally go at the back (or in a different cabinet entirely)
Step 5: Use Vertical Space Wisely
Don’t just think flat—think tall. Deep cabinets often have wasted vertical space above stacked items.
- Stackable shelves create two tiers in one cabinet.
- Hooks under shelves hold mugs or measuring cups.
- Vertical dividers for baking sheets and cutting boards let you grab one without moving the whole pile.
- Tall containers for utensils stand upright and use height instead of footprint.
Step 6: Install Good Lighting
Darkness makes deep cabinets feel even deeper. Battery-powered LED puck lights or motion-sensor light strips make a huge difference. Stick them to the underside of shelves or the cabinet ceiling.
You’ll be amazed at how much easier it is to find things when you can actually see them.
Step 7: Create a “First In, First Out” System
For pantry items, use the “first in, first out” rule. When you bring home new groceries, place them behind the older items. This ensures you use up what you already have before it expires.
For can racks: Use a sloped rack where new cans are loaded from the back and older cans roll to the front. You always grab the oldest item first.
Step 8: Maintain With a 5-Minute Reset
Spend a few minutes each week checking your deep cabinets:
- Pull items forward if they’ve drifted back
- Check for expired food and toss it
- Wipe up any spills or crumbs
- Make sure everything is in its designated zone
This small habit prevents the slow slide back into chaos and keeps your system working long-term.
Quick Comparison: Which Organizer Works Best for Deep Cabinets?
| Item/Method | Purpose | Effectiveness | Difficulty Level | Cost |
|---|---|---|---|---|
| Pull-Out Shelves | Brings items from back to front | Very High. Complete visibility and access | Medium. Requires measuring and mounting | $40-$150+ |
| Lazy Susan | Rotates items for easy viewing | Medium-High. Good for corners and small items | Very Low. Just place | $15-$50 |
| Tiered Shelf Riser | Creates two levels on one shelf | High. Back items become visible | Very Low. Just place | $10-$30 |
| Clear Containers | Makes contents visible at a glance | High. Prevents duplicate buying | Low. Transfer and label | $5-$20 |
| Door-Mounted Rack | Uses inside door space | Medium. Good for lightweight items | Very Low. Hang or stick | $10-$30 |
| Vertical Divider | Stores baking sheets and lids upright | High. No more digging through stacks | Low. Simple installation | $15-$40 |
Common Mistakes to Avoid
- Buying organizers before measuring. This is the number one cause of wasted money. Always measure first.
- Stacking too high. If you have to remove five items to reach one, your system is failing. Consider pull-out shelves instead.
- Storing heavy items on high shelves. This is inconvenient and a safety hazard. Heavy items belong at waist level or lower.
- Not labeling anything. Labels help everyone in the household maintain the system.
- Overfilling the cabinet. A stuffed cabinet is impossible to keep organized. Leave some breathing room.
- Forgetting to maintain the system. Organization is ongoing. A few minutes each week prevents the buildup of clutter.
Special Cases: Deep Cabinets With Unique Challenges
Deep Corner Cabinets
Corner cabinets are the worst offenders. Here’s what works:
- Lazy Susan: Spins to bring items forward. Choose a kidney-shaped or full-round version.
- Magic corner pull-out: The most effective solution. Two-tiered shelves swing out together for full access.
- Pull-out shelves: Custom-cut to fit the L-shape of the cabinet.
Very Deep Cabinets (30+ Inches)
For extremely deep cabinets, consider:
- Double pull-out shelves: Two tiers of shelves, one in front of the other, that slide out independently.
- Freestanding bins: Use bins you can pull out like drawers, even without slides.
- Frequent decluttering: Check these cabinets more often since items can hide for years.
Cabinets With Center Stiles
Center stiles can block pull-out shelves from sliding out fully. Solutions include:
- Split shelves: Two separate shelves that slide out on either side of the stile.
- Custom cut shelves: Designed to fit around the stile.
- Measuring carefully: Ensure the shelf width accounts for the stile before buying.
Frequently Asked Questions (FAQ)
What is the best way to organize deep kitchen cabinets?
Pull-out shelves or sliding trays are the most effective because they bring items from the back directly to you.
How do I stop losing things in my deep cabinets?
Use pull-out shelves, lazy Susans, tiered risers, and clear containers to keep everything visible and accessible.
Should I store heavy items in deep cabinets?
Yes, but store them on lower cabinets and use sturdy pull-out shelves rated for their weight capacity.
How do I organize deep cabinets without buying expensive organizers?
Use what you have—bins, boxes, and jars you already own. Group items by category and use the “move forward” method: push items to the front of the shelf.
What goes in deep cabinets?
Store infrequently used items in the deepest parts, like large platters, extra appliances, and big stockpots. Keep frequently used items in shallower, more accessible spots.
How often should I reorganize my deep cabinets?
Do a full reorganize once or twice a year, but do a quick 5-minute reset every week to keep things from getting out of control.
Which kitchen problem do you want solved next? Share your thoughts in the comments.
More Kitchen Organization Tips and Practical Solutions: