How to Organize a Kitchen Drawer With Too Many Utensils: Simple Sorting Tips & Storage Solutions
You know that frustrating moment when you’re searching for a whisk, and instead, you pull out three spatulas, a ladle, and a mysterious gadget you don’t even recognize?
It happens to the best of us. A utensil drawer crammed with too many tools turns cooking from fun to frustrating. But here’s the good news—you don’t need fancy organizers or a huge budget to fix this problem. The best way to organize a kitchen drawer with too many utensils is surprisingly simple and often uses things you already have at home.
TL;DR
To tackle an overstuffed utensil drawer, empty everything out and sort into keep, relocate, and donate piles. Group similar utensils together by function—cooking, prep, baking, and serving. Use DIY dividers like small boxes or adjustable expandable dividers to create zones. Store most-used utensils near the stove for easy access. For deep drawers, stand large utensils upright in a crock or container. The goal is a system where you can grab what you need quickly without digging.
Key Takeaways
- Declutter first. Be honest about what you actually use regularly.
- Group by function. Separate cooking utensils from prep tools and serving pieces.
- Use what you have. Repurpose small boxes, mason jars, or even a utensil crock for deep drawers.
- Think vertically. Stand frequently used utensils upright in a container on the counter or inside a deep drawer.
- Keep a “less is more” mindset. Fewer items with clear homes mean less mess and less stress.
The Real Causes Behind Utensil Drawer Chaos and How to Fix It
A drawer stuffed with utensils isn’t a sign of failure—it’s usually a sign of good intentions gone wild. We accumulate tools over the years: wedding gifts, impulse buys, gadgets from infomercials, and that one spatula that was on sale. The problem is that these tools often don’t have a clear home, so they get tossed in together, creating a jumbled mess.
Why You Have Too Many Utensils (and Why It Creates Problems)
There’s a simple truth about kitchen tools: most of us only regularly use a small fraction of what we own. The rest just takes up valuable real estate. Here are the main reasons your drawer is overflowing:
- Gift overload. You received duplicates or tools you never asked for.
- Impulse purchases. That fancy avocado tool or garlic press seemed like a great idea at the time.
- Sentimental attachment. You keep that old wooden spoon because it was your grandmother’s, even though you never use it.
- Fear of getting rid of things. “What if I need it someday?” is a common but unhelpful thought.
“The secret to an organized kitchen isn’t more storage space—it’s owning fewer things that actually serve your cooking style.”
Step-by-Step Guide to Organizing Your Overstuffed Utensil Drawer
Step 1: Completely Empty the Drawer
This is the most important step. You can’t organize what you don’t fully see. Pull everything out and place it on your kitchen counter. Don’t skip this—it’s the foundation of everything that follows.
- Wipe down the empty drawer with a damp cloth. A clean starting point feels good.
- Take a moment to notice how much space you actually have.
- Italicized practical tip: Cleaning the drawer before putting things back keeps your cooking space hygienic and fresh.
Step 2: Sort and Declutter Like a Pro
Now comes the honesty session. With everything laid out, sort your utensils into three piles:
Keep Pile: Items you use at least once a month.
- Spatulas, wooden spoons, tongs, ladles, whisks.
- Tools you reach for without thinking.
Relocate Pile: Items that belong elsewhere.
- Measuring cups and spoons (belong near prep area or with baking supplies).
- Corkscrews and bottle openers (belong near serving area).
- Spare parts or tools for appliances (store with the appliance).
Toss/Donate Pile: Items that are broken, bent, or you never use.
- That weird one-function gadget you’ve used once.
- Duplicates you don’t need.
- Rusty or damaged tools.
Italicized practical tip: If you haven’t used it in the past six months, it’s probably safe to donate or toss.
Step 3: Group Similar Utensils Together
Now that you’ve paired down your collection, it’s time to group them. The goal is to make it visually obvious where each type belongs.
Here’s a simple way to break it down:
- Cooking Utensils: Spatulas, wooden spoons, tongs, ladles, slotted spoons.
- Prep Tools: Peelers, zesters, graters, pastry brushes.
- Serving Pieces: Serving spoons, salad tongs, cake servers.
- Baking Tools: Whisks, rolling pins, pastry cutters (if they fit).
- Specialty Gadgets: The items you keep but don’t use daily—like a jar opener or cherry pitter.
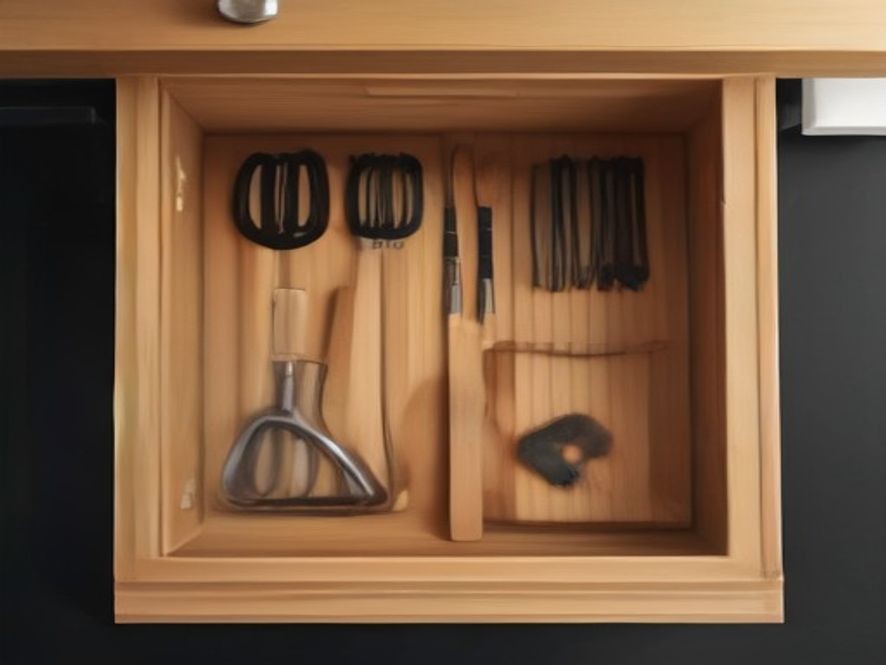
Step 4: Create Zones Using DIY Dividers
This is where the magic happens. You don’t need to buy expensive trays. With a few simple items, you can create zones that keep everything in place and prevent items from sliding into a jumbled mess.
Option A: Cardboard Dividers (Free and Easy)
- Cut pieces of sturdy cardboard to fit the width of your drawer.
- Cut small slots into the cardboard strips so they interlock like a grid.
- This creates custom compartments that perfectly fit your drawer and your utensil collection.
Option B: Repurpose Small Boxes
- Jewelry boxes, phone boxes, or even small gift boxes work great.
- Place them in the drawer to create compartments for small items like peelers, zesters, and measuring spoons.
- They’re free, and you can swap them out easily if your needs change.
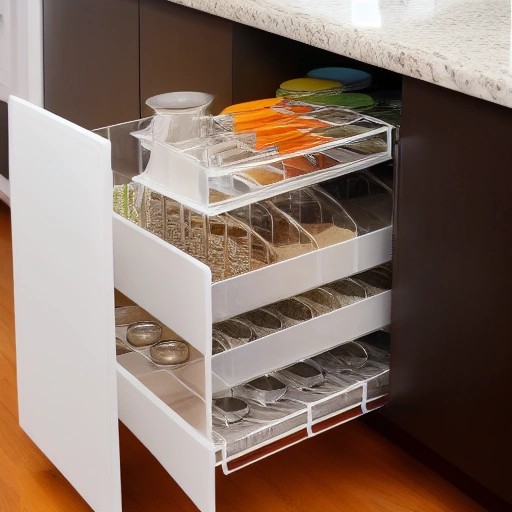
Option C: Expandable Drawer Dividers (Low Cost)
- These adjust to fit any drawer width.
- They create clear zones without permanently altering your drawer.
- You can find them at most home goods stores for very little money.
Step 5: Store Most-Used Utensils Within Reach
Think about how you actually cook. If you use a spatula and tongs every single day, they should be the easiest to grab. Place your most-used tools at the front of the drawer or in the most accessible compartment.
For deep drawers, consider storing frequently used utensils vertically in a crock or container right on the counter or inside the drawer itself. This not only saves space but also keeps the most important tools at your fingertips.
Step 6: Maintain the System
Organization isn’t a one-time event—it’s a habit. Make it easy to keep the drawer tidy by following these simple practices:
- One in, one out. When you buy a new utensil, donate or toss an old one.
- Clean as you go. After washing, put utensils back in their designated spot, not just anywhere.
- Do a quick monthly check. Spend two minutes making sure things are still in the right place.
Comparison Table: Storage Methods for Overstuffed Drawers
| Storage Method | Best For | Effectiveness | Difficulty | Cost |
|---|---|---|---|---|
| Cardboard Dividers | Custom compartments for all utensil types | High—creates perfect custom zones | Easy | Free |
| Expandable Dividers | Long drawers and adaptable spaces | High—flexible and adjustable | Easy | Low |
| Utensil Crock (Counter or Drawer) | Frequently used, larger tools | High—instant access, saves drawer space | Easy | Low-Medium |
| Cutlery Tray | Flatware and smaller prep tools | Medium—can be rigid and limited | Very Easy | Low |
| Small Repurposed Boxes | Small gadgets and odd-sized tools | Medium-High—depends on box size | Very Easy | Free |
Pro Tips for Specific Utensil Challenges
Dealing With Long Utensils
Long spatulas, ladles, and wooden spoons often don’t fit well in shallow drawers. Instead of trying to force them in, consider storing them vertically. Use a tall jar, a utensil crock, or even a decorative pot on your counter. They become a functional part of your kitchen decor and are always within arm’s reach.
Managing Odd-Shaped Gadgets
Items like pizza cutters, ice cream scoops, and can openers can be awkward to store. Their irregular shapes make them hard to organize. Try standing them upright in a container with other larger tools. You can also use a small box or bin to keep them corralled in a corner of the drawer.
Storing Measuring Spoons and Small Items
Small items like measuring spoons, zesters, and peelers can easily get lost in a deep drawer. Use a small tray, a repurposed gift box, or even a simple plastic container to keep them together. This prevents them from sliding under larger utensils and getting hidden.
Frequently Asked Questions
Why does my utensil drawer always get so messy so quickly?
It’s likely because the drawer lacks clear zones. Without boundaries, everything shifts around every time you open and close it, creating a jumbled mess.
What’s the best way to organize a kitchen drawer with too many utensils?
Empty it completely, declutter ruthlessly, group by function, and create zones using simple DIY dividers like cardboard or small boxes.
Should I keep utensils in a drawer or on the counter?
It depends on your space and cooking style. Keep your most frequently used tools in a crock on the counter for easy access. Store less-used items in the drawer.
How many utensils should I actually keep?
A good rule is to keep only what you use regularly. Most home cooks only need about 10-15 core utensils: a couple spatulas, a few spoons, tongs, a whisk, and a ladle. Everything else is optional.
Is it better to store utensils horizontally or vertically?
Vertically (standing upright) is ideal for frequently used tools because it’s easy to grab what you need without digging. Horizontal storage with dividers works well for less-used items.
What do I do with duplicate utensils?
Keep the best one and donate or toss the duplicates. Having multiple spatulas might seem useful, but it just adds to the clutter.
Can I organize my utensil drawer without spending any money?
Absolutely. Use cardboard boxes, mason jars, or even clean takeout containers as free organizers. The system is more important than the tools you use to create it.
Conclusion
An overstuffed utensil drawer doesn’t have to be a permanent source of frustration. The solution lies not in buying more organizers but in making smarter decisions about what you keep and how you arrange it. By emptying your drawer, decluttering thoughtfully, and using simple DIY dividers to create zones, you can transform chaos into calm. Remember, the goal is a system so intuitive that you can find what you need without even thinking about it. A well-organized drawer makes cooking faster, easier, and more enjoyable.
References & Further Reading for Home Cooks:
- The Kitchn: How to Organize a Utensil Drawer
- Better Homes & Gardens: Utensil Drawer Organization Ideas
- Food Network: Kitchen Drawer Organization Tips
Which kitchen organization challenge do you want us to tackle next? Drop your questions in the comments below!