Why Do Pantry Shelves Look Cluttered Even After Organizing? Common Culprits and Simple Fixes
You spent hours organizing your pantry, arranging everything in neat rows, and feeling proud of your work. But when you step back, it still looks cluttered and chaotic. This is a frustrating experience, but the good news is that there are specific, fixable reasons why your pantry shelves look cluttered even after organizing. This guide will show you exactly why this happens and how to solve it for good.
TL;DR
Pantry shelves look cluttered even after organizing because of visual noise—mismatched containers, clashing colors, and too many items on display . The main culprits are using too many small items on one shelf, leaving original packaging visible, not using vertical space, and not leaving enough breathing room between items . To fix this, decant into uniform, clear containers, use shelf risers to reduce visual density, leave some empty space on each shelf, and keep only frequently used items at eye level. A quick weekly “face-forward” routine will maintain the tidy look.
Key Takeaways
- Visual Clutter is Different from Physical Clutter: Even if everything is neatly arranged, mismatched colors, shapes, and packaging can make shelves look messy .
- Uniformity Creates Calm: Using matching or similar containers eliminates visual noise and creates a streamlined, organized look .
- Empty Space Matters: Overfilling shelves makes them look cramped and chaotic. Leaving a little breathing room between items creates a calmer appearance .
- Original Packaging is Often the Enemy: The bright colors, logos, and fonts on store packaging create visual chaos. Decanting into clear containers reduces this noise .
- Vertical Visibility is Key: Items hidden behind others create a “crowded” feel. Using shelf risers and tiered racks improves visibility and reduces visual clutter .
The Real Reasons Behind the Clutter Illusion
Understanding why your organized pantry still looks messy is the first step to fixing it. Let’s break down the main culprits.
Visual Clutter: The Hidden Problem
You’ve organized everything by category and put similar items together. But if you have a row of pasta sauce jars in different shapes, sizes, and colors, plus boxes of cereal with bright logos and bags of chips with clashing designs, your eyes are overwhelmed by the visual noise . This is called visual clutter, and it’s different from physical disorganization.
“Even if everything is in its proper place, a mix of colors, shapes, and materials can make your shelves feel chaotic and busy.”
The Problem with Too Many “Busy” Items
When you have too many small items on one shelf, it creates a sense of density and clutter. Your brain processes each item individually, and when there are too many, it feels overwhelming . This is why minimalist shelves look so peaceful—fewer items means less visual processing.
The “Depth Trap” on Deep Shelves
Deep shelves are notorious for creating visual clutter because items get hidden behind others. When you can’t see everything at once, your brain registers the shelf as “full” and “messy” even if items are organized .
A Step-by-Step Guide to Fixing Visual Clutter
Here is a practical plan to transform your organized but cluttered-looking pantry into a calm, streamlined space.
Step 1: Decant Into Uniform Containers
This is the single most impactful change you can make for visual calm.
- Why It Works: Store packaging is designed to catch your eye—bright colors, bold logos, and clashing fonts. When you transfer items to clear, matching containers, you eliminate this visual noise .
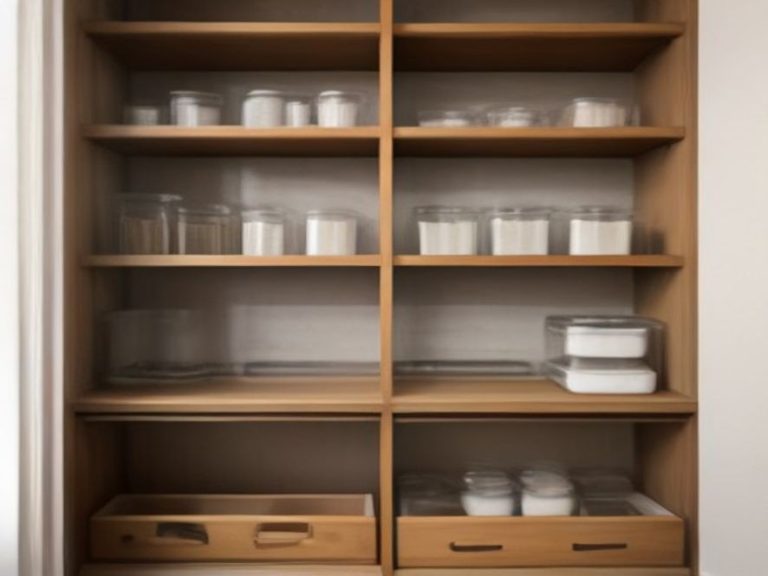
- Choose Clear or Uniform: Clear containers let you see what’s inside while still looking uniform. Alternatively, choose all the same color (like white or glass) for a streamlined look .
- Square or Rectangular Is Best: These shapes line up neatly and eliminate the “jumbled” look that round containers create .
Step 2: Reduce Visual Density
Don’t overfill your shelves. Leaving space is essential for a calm, organized look.
- The 80% Rule: Fill each shelf to about 80% capacity. The empty space gives your eyes a rest and makes the items you do have look more intentional.
- Use Shelf Risers: A shelf riser creates a second tier, which reduces the “crowded” feeling by spreading items out vertically .
- Put Only One Layer Per Shelf: If you have two rows of items on one shelf, the back row gets lost. Use a riser to make both rows visible, or limit each shelf to one layer.
Step 3: Use Labels with Intention
Labels are essential, but they can also create visual clutter if done wrong.
- Keep Labels Simple: Use clean, simple labels in a consistent style. Avoid handwritten labels in different colors and fonts .
- Use Chalkboard Labels: These are popular because they look uniform and can be easily erased and rewritten .
- Face Labels Out: Put labels on the front of containers so they’re readable at a glance, but keep them small and tidy .
Step 4: Group by Category with Clear Boundaries
It’s not enough to group items—you need clear visual boundaries between groups.
- Use Bins or Baskets: Placing like items in a clear bin or basket creates a visual container for each category. This reduces the number of individual items your brain has to process .
- Label Bins, Not Every Item: Instead of labeling every can, label the bin “canned vegetables.” This simplifies the visual field .
- Create Natural Dividers: Use the edges of a shelf riser or a small divider to separate categories visually.
Step 5: Maximize Vertical Visibility
Items hidden behind others create a visual sense of “crowdedness.”
- Use Tiered Risers: These create a stadium-seating effect so you can see every can or jar in a row .
- Install More Shelves: If your pantry has tall shelves, consider adding an extra shelf to reduce the height between shelves. This breaks up visual space and makes items look less crowded .
- Use Lazy Susans: For deep corners, a turntable brings items from the back to the front with a spin, eliminating the “hidden items” problem .
Step 6: Give Everything a “Home” with Some Space
Every item needs a designated spot, but that spot should also have some breathing room.
- The “One-Inch Rule”: Leave at least an inch between items. This small gap makes a big difference in how organized the shelf looks .
- Don’t Stack Too High: Stacking items is fine, but don’t stack them so high that they look unstable or overwhelming .
- Keep Frequently Used Items at Eye Level: This isn’t just about convenience—it also reduces visual clutter because your eyes naturally focus on the items you actually use .
Step 7: Do a Quick Weekly “Face-Forward”
Even with a great system, things can shift and look messy over time.
- Facing: This is a retail term for turning items so their labels face front. Spend 5 minutes each week facing all items forward .
- Straighten as You Go: When you grab a can or a box, take an extra second to straighten the row as you put it back .
- Check for Overcrowding: If a shelf consistently looks too full, it might be time to move some items elsewhere .
Quick Reference: Fixes for Visual Clutter
| Problem | Visual Fix |
|---|---|
| Mismatched containers and packaging | Decant into uniform, clear containers |
| Too many items on one shelf | Use shelf risers and follow the 80% rule |
| Items hidden behind others | Use tiered risers or limit shelves to one layer |
| Too many small items creating density | Group into bins and label the bin, not every item |
| Clashing colors and logos | Remove original packaging and use clear containers |
| No visual breaks between categories | Use baskets, dividers, or risers to create boundaries |
| Items not facing forward | Do a weekly 5-minute “face-forward” routine |
Frequently Asked Questions
Why does my pantry still look cluttered even after organizing?
Most likely, you’re dealing with visual clutter—mismatched packaging, too many items on display, and no empty space between items. Decanting into uniform containers and using shelf risers can help .
What is visual clutter?
Visual clutter is when your eyes are overwhelmed by too many different colors, shapes, fonts, and textures. Even if everything is in its correct place, visual clutter makes a space feel messy .
Should I use open shelving or closed containers?
Closed containers can reduce visual clutter, but clear containers are ideal because you can see what’s inside while still having a uniform look .
How do I make my pantry look more streamlined?
Use uniform containers, group items into bins, and leave some empty space on each shelf. A consistent color scheme (like all white or glass containers) also helps .
How can I keep my pantry looking tidy long-term?
Do a quick 5-minute weekly “face-forward” routine, follow the FIFO method when restocking, and check for overcrowding monthly .
References
Expert Solutions for a Clutter-Free Look:
- Organize By Heart – Why Your Pantry Still Looks Cluttered
- The Kitchn – Pantry Organization Mistakes
- Real Simple – Pantry Organization Mistakes
- Better Homes & Gardens – Why Your Pantry Looks Cluttered
A pantry that looks organized is about more than just physical order—it’s about visual calm. By decanting into uniform containers, using shelf risers, and leaving some breathing room, you can transform your pantry from cluttered-looking to truly serene. Remember, your pantry should be a space that makes you feel calm, not overwhelmed.
Which kitchen problem do you want solved next? Share your thoughts in the comments.