How to Organize a Pantry for Kids and Easy Access: A Practical Family Guide
You’ve organized the pantry three times this year, but somehow the granola bars still end up scattered and the kids keep asking, “Mom, where’s the…”
TL;DR
Organizing a pantry for kids is about creating a system that works with your family, not against it. Place kid-friendly snacks on low, accessible shelves so children can help themselves independently, which builds confidence and reduces the “where’s the snack” questions . Use clear bins or baskets to group similar items, and label shelves with simple words (and pictures for non-readers) so everyone knows where things belong. Set up a dedicated lunch-packing zone to streamline hectic mornings. Most importantly, keep the system simple enough that even tired parents and hungry kids can maintain it.
Key Takeaways
- Lower shelves are for kids — keep snacks and items they can access on bottom shelves, and store unsafe items (glass, knives, cleaning supplies) up high or behind childproof locks
- Bins and labels are your training tools — clear bins group like items together, and labels tell the whole family where things go without you having to explain it every time
- Create a snack zone and a lunch zone — dedicated areas reduce chaos during busy mornings and snack requests
- Lazy Susans are kid-friendly — a spinning turntable lets kids access snacks with one hand, making it easy even for toddlers
- Involve kids in the process — when children help set up the system and understand the zones, they’re more likely to maintain it
Why the “Kid” Factor Changes Everything
Organizing a family pantry is different from organizing a pantry for one person. Professional organizer Maria Baer, founder of The Baer Minimalist and mom of six-year-old twins, explains that a kid-friendly kitchen isn’t a one-time project . “Your kids will grow out of certain items while they grow into new ones,” she says, meaning you should expect to reassess and reorganize every few months .
The payoff, however, is significant. Baer notes, “It is incredible to watch their independence and confidence soar in a space where they have some autonomy” . When kids can access their own snacks, pack their own lunches, and navigate the pantry without help, they gain valuable life skills while making your life easier.
Step-by-Step Guide to a Kid-Friendly Pantry
Step 1: Empty, Declutter, and Clean
Start fresh. Take everything out of your pantry and check expiration dates—many families free up 30-40% of their space just by tossing expired items . Group similar items together on your counter so you can see exactly what you have before planning your zones .
Wipe down all shelves and vacuum crumbs—a clean slate makes the whole process feel fresh and intentional .
Step 2: Think About Safety First
Before you organize for accessibility, organize for safety. Store anything dangerous—glassware, sharp items, cleaning supplies, or foods you don’t want kids getting into—on high shelves or in cabinets with childproof locks . Baer recommends magnetic cabinet locks for easy adult access while keeping kids safe .
What goes on lower shelves? Anything you don’t mind kids getting into. This includes durable kid-safe containers, their snacks, and items you want them to access independently .
Step 3: Create Kid-Friendly Zones
The Snack Zone (Low Shelf)
Place all kid-accessible snacks on a lower shelf where they can reach without climbing or asking for help . Use clear bins or baskets to group similar snacks—one bin for granola bars, one for crackers, one for fruit pouches . For younger kids who can’t read, label bins with pictures alongside text so they can find what they want .
Consider a “treats” section that’s less accessible—up high or tucked behind other items—where special snacks live. This creates intentional decision-making rather than mindless grabbing .
The Lunch Zone
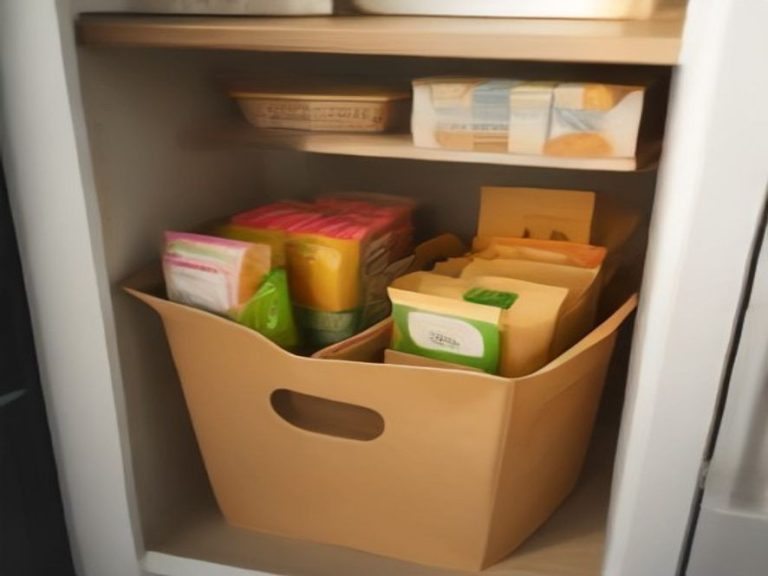
Set up a dedicated lunch-packing station: one basket, bin, or shelf that holds everything needed for school lunches—portion-sized snacks, small boxes of raisins, mini rice cakes, and biscuit packets . When everything is in one obvious place, making lunch becomes a 3-minute task instead of an 8-minute rummage, and older kids can pack their own lunches without supervision .
The Grab-and-Go Station
A “grab-and-go” drawer or shelf works brilliantly for busy mornings. Shira Gill, organizing expert and author of Minimalista, recommends creating a station at kid-friendly height where snacks, treats, or on-the-go breakfast items live . It prevents the infamous “snack avalanche” and gets everyone out the door faster .
Step 4: Choose the Right Storage Tools
Clear Bins and Baskets
Bins are the MVP of family pantry organization. They contain chaos, group similar items, and can be pulled out as a unit—no digging . Clear bins let you see contents at a glance, while woven or fabric baskets hide visual clutter . For a budget option, a simple clear bin from IKEA or a dollar store works great .
Lazy Susans for One-Handed Access
A turntable is a game-changer for kids. With a 360-degree spin, a child can grab a snack one-handed without pulling everything off the shelf . These work perfectly for displaying toddler pouches, snacks, oils, and sauces .
Labels (Simple and Visual)
Labels do the training for you . A clearly labeled shelf tells everyone where things go without you having to explain. For non-readers, use picture labels alongside text .
Budget tip: A $10 set of chalkboard labels with a marker does the job perfectly—no Cricut or expensive equipment needed .
Step 5: Involve the Kids
A system only works if everyone in the household uses it . Spend 10-15 minutes walking your family through the new setup. Show them where each zone is, what the labels mean, and where backup stock lives . For younger kids, visual labels with pictures help them navigate without reading .
Let kids take ownership of their zone—a 3-year-old can close a bin and push it back on the shelf, which builds both independence and responsibility . When older kids help set up the snack zone, they’re more likely to maintain it .
Step 6: Make the Right Thing the Easy Thing
The most organized pantry in the world will fail if it fights human nature. Good systems work with it . Store pasta near sauces, place breakfast items together, and put daily-use items at the most convenient heights. When “where it goes” is also “the most natural place to put it,” your family will comply without thinking .
Comparison: Storage Solutions for Kid-Friendly Pantries
| Storage Tool | Best For | Kid-Friendly Perk | Price Range |
|---|---|---|---|
| Clear bins | Snack packets, pouches, granola bars | See contents at a glance; easy to pull out | $1-$10 |
| Lazy Susan turntable | Pouches, jars, small snacks | One-handed spin for easy access | $6-$20 |
| Wire baskets | Produce, larger snacks | Breathable, visible, lightweight | $1.50-$8 |
| Bamboo or fabric bins | General snack storage | Looks tidy even when slightly chaotic inside | $8-$25 |
| Over-door pockets | Spices, small packets | Uses unused door space | $10-$20 |
| Small drawer organizers | Individual snack packs | Great for drawer conversion | $5-$15 |
The Weekly Reset Habit
Organizing isn’t a one-time event—it’s a system. Professional organizers recommend a quick 5-10 minute weekly reset to keep the pantry functional . During this time:
- Return stray items to their zones
- Check for things that have wandered
- Make note of what needs restocking
A system that requires constant maintenance won’t last. Aim for “lazy-proof” organization that’s easy to maintain even when everyone is tired and in a hurry .
FAQ: Kid-Friendly Pantry Organization
1. Where should I store snacks in a kid-friendly pantry?
Store kid-accessible snacks on lower shelves they can reach without climbing . Place special or high-sugar treats higher up where they require effort to reach .
2. How do I label for kids who can’t read?
Use picture labels alongside text. For example, a picture of an apple next to the word “Fruit” or a cracker image next to “Snacks” .
3. What should I put on low shelves?
Put items you don’t mind kids getting into—kid-safe containers, snacks, and durable kitchenware . Keep dangerous items (glass, knives, cleaning supplies) on high shelves or behind locks .
4. How often should I reorganize for growing kids?
Expect to reassess every few months. As kids grow, their reach extends, and their needs change . Adjust zones to match their new capabilities and responsibilities.
5. How do I get kids to actually use the system?
Involve them in the setup process, let them own their zone, and use labels so they don’t have to ask for directions . A system they helped build is a system they’ll respect.
Start Your Kid-Friendly Pantry Today
A pantry organized for kids isn’t just about preventing chaos—it’s about building independence, teaching responsibility, and creating a space where everyone in the family can thrive. Start by setting up one low shelf for snacks and a clear bin for lunch supplies. Once you see how much easier mornings become, you’ll want to tackle the rest.
The goal isn’t perfection. The goal is a pantry that works for your real family, every single day.
Which zone are you excited to set up for your kids first? Share your thoughts in the comments.
How to Organize a Pantry for Kids and Easy Access: Family-Friendly Storage Solutions for Busy Kitchens