How to Organize a Small Kitchen Drawer With Limited Space: Simple Fixes for Jumbled Utensils
You open your kitchen drawer and instead of grabbing a spatula, you get a tangled mess of whisks, tongs, and measuring spoons—and the one thing you actually need is somehow stuck at the very bottom.
It happens every time. You’re in the middle of cooking, and you need that one specific utensil. But your drawer is so packed and disorganized that you end up digging through a pile of mismatched tools. You pull out three things you don’t need before you finally find the one you were looking for. Small kitchen drawers are notorious for becoming chaotic catch-alls. But with a few smart strategies, even the tiniest drawer can become a model of efficiency.
TL;DR:
- The Problem: Small drawers quickly become cluttered because items shift around and get buried under each other.
- The Solution: Use drawer dividers, compartment trays, and vertical storage to keep everything in its place.
- The Strategy: Declutter ruthlessly, categorize items by function, and use organizers that maximize every inch of space.
Key Takeaways
- Measure your drawer’s interior before buying any organizers. Width, depth, and height matter more than you think.
- Declutter first. Get rid of duplicate tools, broken items, and things you never use. This is the most important step.
- Use adjustable dividers instead of fixed ones. They flex to fit different items and drawer sizes.
- Stand utensils upright in crocks or jars. This uses vertical space and makes every tool visible.
- Group by function. Keep cooking utensils together, baking tools together, and eating utensils separate.
Why Small Drawers Get So Messy
The main issue with small kitchen drawers is they’re often treated as junk drawers. People throw in random items—rubber bands, loose tea bags, bottle openers, random screws—and over time, the useful tools get buried.
“Most kitchen problems come from small maintenance habits that are often ignored.”
Another problem is that items shift. Every time you open and close the drawer, tools move around and get tangled. Without dividers or compartments, your spatulas, tongs, and whisks will slowly migrate into a single chaotic pile.
Step-by-Step Guide to a Perfect Small Drawer
Step 1: Empty and Declutter Completely
Take everything out of the drawer. Yes, everything. Place it all on your counter. This is the moment of truth.
Now sort items into three piles:
- Keep: Tools you use at least once a month.
- Donate or give away: Duplicates, items you never reach for, or things in good condition you don’t need.
- Toss: Broken, rusted, or worn-out items.
Be honest. If you have three wooden spoons, you probably only need two. If you have a garlic press you’ve used twice in five years, it’s time to say goodbye. A smaller collection of useful tools is much easier to organize than a drawer full of unused clutter.
Step 2: Measure Your Drawer
Before buying any organizers, measure the interior of your drawer. You’ll need:
- Width (side to side)
- Depth (front to back)
- Height (how tall the drawer is inside)
Organizers that don’t fit are a waste of money. Many people buy compartments that are too tall and then can’t close the drawer.
Step 3: Categorize by Function
Group your tools by how you use them. This is the core of good organization. When you’re cooking, you want to go to one spot for all your cooking tools, not search across multiple drawers.
Common categories for a small drawer:
- Cooking tools: Spatulas, tongs, wooden spoons, ladles, whisks
- Measuring tools: Measuring spoons, measuring cups
- Baking tools: Pastry brush, dough scraper, cookie cutters
- Eating utensils: Forks, spoons, knives (kept in a separate drawer if possible)
- Miscellaneous: Bottle openers, can openers, peelers, grater
Putting all related items together means you can grab exactly what you need without hunting.
Step 4: Choose the Right Organizers
Here are the best ways to organize a small drawer, from cheapest to most investment:
Option A: Adjustable Drawer Dividers
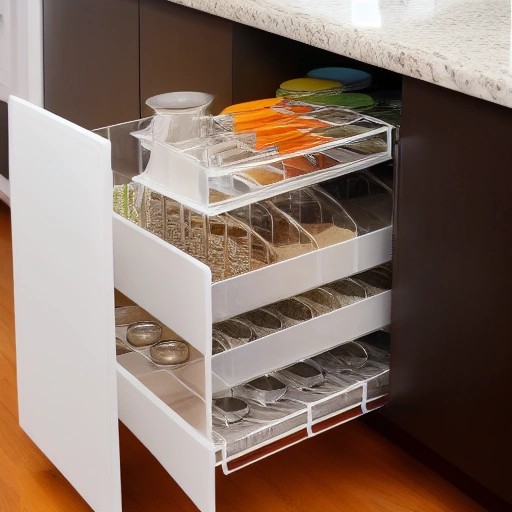
These are spring-loaded or expandable dividers that press against the sides of your drawer. They create customizable sections that you can adjust as your needs change.
Why they work: You can create a section for spatulas, another for measuring spoons, and another for small gadgets. They keep items from migrating into each other’s spaces.
Cost: $10-$30 for a set
Option B: Bamboo or Wood Cutlery Trays
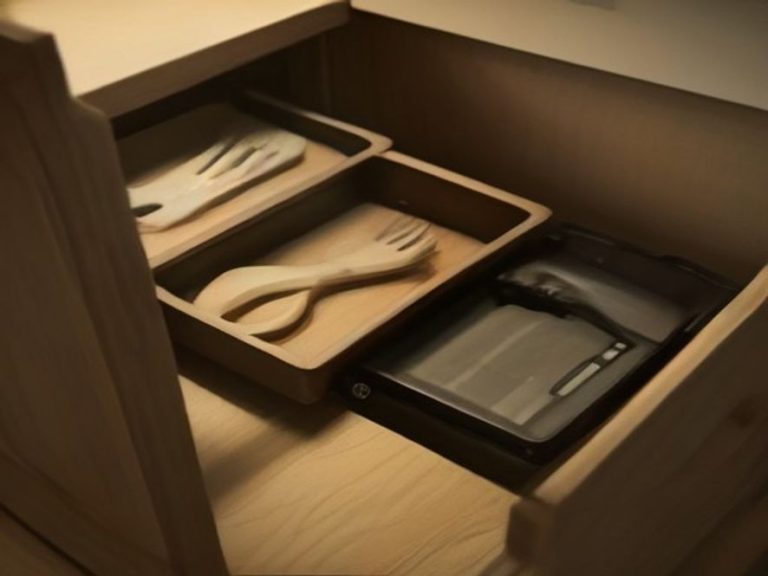
These are classic for a reason. They come with pre-made slots for forks, spoons, and knives. They’re perfect for eating utensils and smaller tools.
Why they work: They keep every item separated and visible. You never have to dig for a butter knife again.
Cost: $10-$25
Option C: Expandable Utensil Organizer
These are like cutlery trays but with movable dividers. You can customize the slot sizes to fit your specific tools. Longer slots for spatulas, shorter slots for small gadgets.
Why they work: They’re flexible. If you buy a new utensil that’s larger than your old one, you can adjust the slot size to accommodate it.
Cost: $15-$40
Option D: Small Crocks or Jars for Vertical Storage
For utensils that are too long or oddly shaped for a standard drawer organizer, stand them upright. Use a small ceramic crock, a mason jar, or a tall mug placed right inside the drawer.
Why it works: It uses vertical space that usually goes unused. Long tools like whisks and spatulas are instantly visible and easy to grab.
Cost: Use what you already have (free) or buy for $5-$15
Option E: DIY Cardboard Dividers
If you’re on a budget, cut strips of cardboard to create a simple grid inside your drawer. It’s not pretty, but it works. You can upgrade to nicer materials later.
Cost: Free
Step 5: Place Items Back With Intention
Now that you have your organizers, put items back in a logical way:
- Most frequently used items go at the front of the drawer
- Less frequently used items go toward the back
- Heavy items go in sturdy sections, not flimsy ones
- Long items go in vertical crocks or long slots
Label sections if you have multiple people in the household. A small label makes it easy for everyone to put things back where they belong.
Step 6: Use the “One In, One Out” Rule
This is a simple rule to prevent clutter from creeping back. When you buy a new kitchen tool, get rid of an old one. This keeps your drawer from getting overcrowded again.
Quick Comparison: Which Drawer Organizer Is Right for You?
| Item/Method | Best For | Effectiveness | Effort Level | Cost |
|---|---|---|---|---|
| Adjustable Dividers | Mixed utensils of different sizes | High. Keeps categories separated | Low. Just expand and place | $10-$30 |
| Bamboo Cutlery Tray | Standard forks, spoons, knives | High. Perfect for everyday flatware | Very Low. Just place in drawer | $10-$25 |
| Expandable Organizer | Customizable slot sizes | High. Fits your specific tools | Low. Move dividers as needed | $15-$40 |
| Vertical Crock/Jar | Long utensils (spatulas, whisks) | High. Uses vertical space | Very Low. Just place in drawer | $0-$15 |
| DIY Cardboard | Budget-friendly option | Medium. Works but less durable | Medium. Requires some cutting | Free |
Special Cases: Small Drawers With Unique Challenges
Drawer Too Shallow for an Organizer
Some drawers are just 2-3 inches deep. This is common in older kitchens or apartment rentals. Here’s what works:
- Use flat organizers that are less than 1.5 inches tall
- Lay tools flat in a single layer instead of stacking them
- Use a mesh flatware tray that’s very low-profile
Drawer Is Deeper Than Standard
If your drawer is tall, stand items upright. Use tall crocks or jars inside the drawer. This is a fantastic way to store long items like tongs, whisks, and spatulas. You can see every tool at a glance without digging.
Drawer Is Narrow
For narrow drawers, use a single line of organizers. Long, thin baskets or cutlery trays designed for narrow spaces work well. Keep the items in these drawers very specific—for example, just baking tools or just measuring tools.
Common Mistakes to Avoid
- Not measuring first. Buying organizers that are too big is the most common and frustrating mistake.
- Keeping too many tools. If you haven’t used it in a year, you don’t need it. Clutter is the enemy of organization.
- Ignoring vertical space. Standing items upright can double your usable space.
- Not grouping by function. Mixing cooking tools with baking tools with eating utensils creates confusion.
- Overfilling the drawer. A stuffed drawer is impossible to keep organized. Leave some breathing room.
- Forgetting maintenance. A 5-minute reset each week prevents clutter from returning.
Additional Tips for Small Kitchen Drawers
Use the Drawer as a “Landing Zone”
Dedicate one small drawer to the items you reach for multiple times a day. This could be:
- Spatula and tongs for cooking
- Coffee scoop and stirrer for your morning routine
- Measuring spoons and cup for quick prep
Having these items in the most accessible spot makes your daily cooking routine smoother.
Keep Specialty Tools Separately
Don’t put every random kitchen gadget in your main drawer. Instead:
- Store infrequently used items in a less accessible cabinet or drawer
- Keep specialty items (like cake decorating tools) in a separate drawer or bin
- Consider a wall-mounted magnetic strip for your most-used metal tools
Use Clear Containers for Small Items
For tiny items like bottle openers, corkscrews, and measuring spoons, use a small clear container or divided box. This keeps them from getting lost among larger tools.
Frequently Asked Questions (FAQ)
What is the best way to organize a shallow kitchen drawer?
Use flat, low-profile trays and lay items in a single layer. Avoid tall organizers that won’t fit.
How do I stop my utensils from getting tangled in a drawer?
Use dividers or compartment organizers. They separate items so they can’t shift and tangle together.
What’s the best organizer for a small drawer?
Adjustable drawer dividers are the most flexible. They can adapt to different items and drawer sizes.
Can I use a small drawer for spices?
Yes. Use narrow containers or small jars standing upright. Place them in a tray or divider to keep them from tipping.
How often should I declutter my kitchen drawers?
Do a quick declutter once a season. Check for items you no longer use and remove duplicates.
What should I do with extra utensils I don’t use?
Donate them to a thrift store, give them to a friend, or keep them in a backup drawer or bin in the pantry.
Which kitchen problem do you want solved next? Share your thoughts in the comments.
More Kitchen Organization Tips and Practical Solutions: