How to Organize a Kitchen Cabinet for Cleaning Supplies: Smart Storage for a Safer, Tidy Home
You reach under the sink for dish soap, and a bottle of all-purpose cleaner tips over, rolling behind the pipes while a stray sponge falls into the mop bucket—and suddenly you’re cleaning up a bigger mess than you started with.
It’s a frustrating scene that plays out in kitchens everywhere. The cabinet under the sink or the one you designated for cleaning supplies quickly becomes a chaotic jumble of half-empty bottles, crumpled rags, and forgotten scrub brushes. Not only does this make it hard to find what you need, but it also creates a safety risk when harsh chemicals get mixed up or left within reach of kids and pets. The good news is that with a few smart strategies, you can transform this messy spot into an organized, safe, and easy-to-use zone.
TL;DR:
- The Problem: Cleaning supply cabinets become cluttered, hard to access, and potentially unsafe, especially under the sink with plumbing obstacles.
- The Solution: Use pull-out drawers, tension rods, door racks, and labeled bins to separate categories and make everything visible.
- The Strategy: Store heavy or toxic items safely on lower shelves, use vertical space, and adopt a simple system that everyone in the household can follow.
Key Takeaways
- Separate cleaning supplies from food. Never store chemicals near food or food prep areas.
- Group by category. Keep all-purpose cleaners together, dishwashing supplies together, and specialty cleaners separate.
- Use the door for lightweight items. Over-door racks and adhesive hooks hold sponges, gloves, and small bottles.
- Store hazardous items safely. Use locked bins or high shelves to keep children and pets safe.
- Label everything. Labels help everyone know where things belong and what stays where.
Why Cleaning Supply Cabinets Get So Messy
The main problem with cleaning supply cabinets is that they become a catch-all for anything that doesn’t have a clear home. People shove bottles wherever they fit, and over time, items get pushed to the back and forgotten.
“Most kitchen problems come from small maintenance habits that are often ignored.”
Under-sink cabinets also have the added challenge of plumbing pipes. The P-trap and water lines take up valuable space, making it hard to use standard shelves or organizers.
Another common issue is safety. Many people store cleaning chemicals alongside food items or within easy reach of children. This is a serious hazard that can be easily fixed with proper organization and storage habits.
Step-by-Step Guide to Organizing Your Cleaning Cabinet
Step 1: Empty, Declutter, and Sort
Take everything out of the cabinet and place it on the counter. Sort items into categories:
- All-purpose cleaners: Spray bottles, multi-surface cleaners
- Kitchen-specific cleaners: Dish soap, dishwasher pods, stainless steel polish
- Bathroom cleaners: Toilet bowl cleaner, tub and tile spray
- Floor cleaners: Mop solution, floor polish
- Specialty cleaners: Glass cleaner, wood polish, granite cleaner
- Tools and accessories: Sponges, scrub brushes, rubber gloves, trash bags, mop heads
Check expiration dates. Cleaners don’t last forever. Toss anything that’s old, nearly empty, or that you haven’t used in over a year.
Dispose of chemicals properly. Don’t pour harsh chemicals down the drain or toss them in the trash. Check your local waste disposal guidelines for hazardous materials.
Step 2: Check for Leaks and Clean the Cabinet
Before putting anything back, inspect the cabinet for leaks. Look for signs of water damage, mold, or mildew. Wipe down the interior with a damp cloth and mild cleaner. If the cabinet smells musty, place a small bowl of baking soda inside to absorb odors.
Step 3: Measure Your Space
Measure the cabinet’s interior before buying organizers. You’ll need:
- Width (side to side)
- Depth (front to back)
- Height (top to bottom)
- Pipe locations (the P-trap and water supply lines)
Organizers that don’t fit are a waste of money. Always measure first.
Step 4: Choose the Right Organizers
Here are the best tools for organizing cleaning supplies, from simplest to most impactful.
Option A: Pull-Out Drawers or Sliding Trays (Under the Sink)
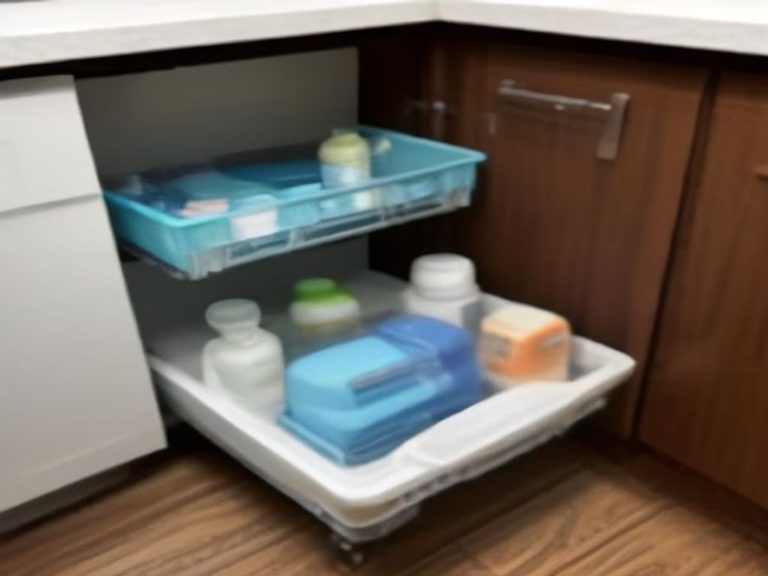
A pull-out drawer sits on the cabinet floor and slides forward on tracks. It brings items from the back of the cabinet right to you, eliminating the need to reach around the pipes.
Why they work: Full access to everything. You can see all your cleaners at a glance. Some models have cutouts specifically designed to fit around plumbing.
Cost: $40-$120
Option B: Tension Rods for Spray Bottles
Install a tension rod between the cabinet walls, near the front. Hang spray bottles by their triggers. This gets them off the floor and keeps them upright so they don’t leak or fall over.
This is one of the cheapest and most effective tricks for under-sink organization.
Cost: $5-$15
Option C: Over-the-Door Racks or Adhesive Hooks
Use the inside of the cabinet door for lightweight items. Clear pockets hold sponges, gloves, and small bottles. Adhesive hooks hang scrub brushes, dish wands, and spray bottles.
Why they work: They use vertical space that’s otherwise wasted. Small items are always visible and easy to grab.
Cost: $10-$30
Option D: Stackable Bins and Baskets
Clear stackable bins are perfect for grouping similar items. One bin for dishwasher pods, another for all-purpose cleaners, another for rags and sponges.
Label each bin clearly so everyone knows where things go.
Why they work: You can pull out a whole bin when you need a specific category. Items stay contained and don’t drift around the shelf.
Cost: $5-$25 per bin
Option E: Shelf Risers
Add a small shelf riser in areas where pipes allow. This creates two tiers, doubling your usable space.
Why they work: Taller items like spray bottles can stand on the bottom tier while shorter items like sponges and gloves sit on the top tier.
Cost: $10-$20
Step 5: Store Hazardous Items Safely
Safety first. Cleaning supplies are among the most common causes of poisoning in children. Take these precautions:
- Store toxic cleaners in a locked cabinet or out of reach. Consider a childproof lock on the cabinet door.
- Separate chemicals. Never mix different types of cleaners (like bleach and ammonia) as they can create toxic fumes.
- Store food and chemicals separately. Food items belong in the pantry, not in the cleaning supply cabinet.
- Keep original labels. Never transfer chemicals into unmarked containers. If the original label is damaged, add a new one clearly identifying the contents.
“The most common household poisonings involve cleaning products,” reminds safety experts. Proper storage is your first line of defense.
Step 6: Create a System That’s Easy to Maintain
Group by category:
- Dishwashing supplies (soap, pods, rinse aid)
- All-purpose cleaners
- Specialty cleaners (glass, wood, stainless steel)
- Tools (sponges, scrub brushes, gloves)
- Trash bags and recycling bags
Frequency rule:
- Daily items (dish soap, sponge) go at the front
- Weekly items (all-purpose cleaner, glass cleaner) go in the middle
- Monthly items (specialty cleaners, extra supplies) go in the back
Step 7: Label Everything
Labels make it easy for everyone in the household to maintain the system. Use a label maker or simple tape and marker. Label bins, shelves, and even spray bottles so everyone knows what goes where.
Step 8: Maintain With a Quick Weekly Check
Spend a few minutes each week:
- Wipe down any spills or drips
- Check for expired or nearly empty products
- Return items to their designated bins
- Make sure childproof locks are working
Quick Comparison: Which Organizer Works Best for Cleaning Supplies?
| Item/Method | Purpose | Effectiveness | Difficulty Level | Cost |
|---|---|---|---|---|
| Pull-Out Drawer | Brings items from back to front | Very High. Full access | Medium. Requires measuring and mounting | $40-$120 |
| Tension Rod | Holds spray bottles vertically | High. Frees up floor space | Very Low. Installs in seconds | $5-$15 |
| Door-Mounted Rack | Stores lightweight items on the door | Medium-High. Great for sponges and gloves | Low. Hooks or adhesive | $10-$30 |
| Stackable Bins | Groups items by category | High. Keeps everything tidy | Very Low. Just place and label | $5-$25 |
| Shelf Riser | Creates two-tier storage | Medium. Works where pipes allow | Very Low. Just place | $10-$20 |
| Childproof Lock | Keeps children out of hazardous items | Very High. Essential safety measure | Low. Easy installation | $5-$15 |
Common Mistakes to Avoid
- Storing food in the same cabinet. Cleaning chemicals and food don’t mix. Keep them separate .
- Not labeling containers. If you transfer a cleaner to a different bottle, label it clearly.
- Overfilling the cabinet. A stuffed cabinet is impossible to keep organized. Leave some breathing room.
- Storing heavy items on door racks. Door racks have weight limits. Stick to lightweight sponges and gloves.
- Ignoring expiration dates. Cleaners lose effectiveness over time. Check dates and toss old products.
- Forgetting about child safety. If you have young children, a simple cabinet lock is essential.
Additional Tips for Cleaning Supply Organization
Use a Caddy for Frequently Used Items
If you clean multiple rooms, keep a small caddy with your go-to cleaners and tools. You can grab it and carry it to different parts of your home, then return it to the cabinet when you’re done.
Keep a “Stain Spot Treat” Basket
Have a small basket with items specifically for spot-treating stains: a small spray bottle of stain remover, a few cleaning cloths, and a scrub brush. This helps you respond quickly to spills.
Store Extra Supplies Elsewhere
If your kitchen cleaning cabinet is overflowing, store backup supplies in a hall closet or laundry room. Keep only the daily essentials in the kitchen cabinet.
Consider a Two-Tier System
If you have space, use a two-tier lazy Susan inside the cabinet. The bottom tier holds tall spray bottles, and the top tier holds smaller items like sponges and gloves.
Frequently Asked Questions (FAQ)
What is the best way to organize cleaning supplies under the sink?
Use a pull-out drawer, tension rods for spray bottles, and stackable bins for grouped categories. This makes everything visible and accessible.
How do I store cleaning supplies safely?
Keep them out of reach of children and pets. Use childproof locks on cabinets. Never store cleaning chemicals near food .
What should I store under the kitchen sink?
Store kitchen-specific cleaners, dish soap, dishwasher pods, sponges, gloves, and trash bags. Keep food items in a separate pantry or cabinet.
How do I organize a deep cabinet for cleaning supplies?
Use pull-out shelves or sliding trays to bring items from the back to the front. Group by category and use clear bins so you can see what you have.
Can I store different types of cleaners together?
Yes, but keep them separated by category. Never mix different chemicals like bleach and ammonia, as they can create toxic fumes.
How often should I declutter my cleaning supply cabinet?
Do a quick check every month. Check for expired products, empty bottles, and items you haven’t used in a while.
Which kitchen problem do you want solved next? Share your thoughts in the comments.
More Kitchen Organization Tips and Home Safety Advice: