How to Deep Clean Under the Kitchen Sink: A Complete Guide to a Safer, Fresher Space
That dark cabinet under your sink often becomes a chaotic dumping ground for cleaning supplies, but neglecting it can lead to mold, pests, and even costly water damage.
You’re rushing to grab a sponge, and a tsunami of spray bottles, old rags, and mystery containers comes tumbling out. The cabinet floor feels grimy, and there’s a faint musty smell that you’ve been ignoring for months. If this sounds familiar, you’re not alone—and you’re in the right place. This guide will walk you through everything you need to know to deep clean under your kitchen sink, organize it like a pro, and keep it that way.
TL;DR
- The Key Steps: Empty everything out, declutter ruthlessly, scrub the cabinet thoroughly, check for leaks, let it dry completely, and then organize strategically .
- Watch for Leaks: While the cabinet is empty, inspect pipes and valves for moisture—catching a small leak early can save you thousands of dollars in repairs .
- Mold Danger: Mold can start growing in a damp cabinet within just 24 to 48 hours . Keep the area dry!
- Smart Storage: Use organizers like tension rods, pull-out drawers, or bins to make the most of the awkward space around the plumbing .
Key Takeaways
- Don’t Store Food: Never store produce, pet food, or any edible items under the sink. The moisture and humidity create a perfect environment for mold to grow on them .
- Declutter First: Before you buy any organizers, sort your supplies. Toss old, expired, or rusty products and consolidate duplicates .
- Dry Completely: After scrubbing, leave the cabinet doors open for at least 30 minutes to ensure it’s 100% dry before putting anything back .
- Protect the Bottom: Consider using an absorbent mat or shelf liner on the cabinet floor to protect it from spills and minor leaks .
The Real Causes Behind a Dirty Under-Sink Area and How to Fix It
The space under your kitchen sink is a perfect storm for grime and disorganization. It’s dark, often damp, and subject to a daily “out of sight, out of mind” mentality . The main culprits are moisture and clutter.
Water seeps in from small plumbing leaks, condensation on pipes, splashes from the sink above, or even a dripping sponge . In less than two days, that moisture can start mold growth . Adding to the problem, our natural tendency to shove every cleaning spray, sponge, and “just in case” product in there creates clutter that prevents air circulation, traps moisture, and makes it impossible to spot the early signs of a leak or pest infestation .
How to Deep Clean and Organize Under Your Kitchen Sink: A Step-by-Step Guide
Step 1: The Total Empty and Declutter
The first rule of deep cleaning is to start with a blank canvas. You can’t effectively clean or organize when you’re just moving bottles around.
- Take Everything Out: Pull every single item from the cabinet and lay it all out on your counter or floor . This gives you a full picture of what you’re dealing with.
- Sort Ruthlessly: Now, go through your supplies and decide what stays and what goes .
- Toss It: Check expiration dates on cleaners, and throw away any products that have changed color, smell, or consistency. Get rid of rusty aerosol cans, stained sponges, and worn-out scrub brushes .
- Consolidate: If you have three half-empty bottles of the same product, combine them. Safety warning: Never mix different chemicals together .
- Relocate: Move anything that doesn’t belong. This is not the right place for bug spray, lightbulbs, or pantry items .
Step 2: Deep Scrub and Inspect
Now that the cabinet is empty, it’s time to get to work.
- Vacuum First: Before using any liquid cleaner, use a vacuum with a wand attachment to suck up all the dust, dirt, crumbs, and cobwebs. This prevents you from creating a hard-to-clean “wet sludge” .
- The Deep Clean: Use a non-abrasive, pH-neutral cleaner to scrub the entire interior—walls, floor, and the underside of the sink. A simple 50/50 solution of white vinegar and water is effective and safe for most cabinets .
- Important: If you have a delicate finish on your cabinet or sink, avoid acidic cleaners and stick to a mild soap and water solution .
- The Leak Check: This is the most critical step. With the cabinet empty, you can easily inspect the P-trap, shut-off valves, and supply lines. Look closely for any signs of “sweating” (condensation) or actual drips . Catching a small leak now can save you from replacing the entire cabinet floor later .
Step 3: Dry and Protect
Moisture is the enemy of a clean, safe under-sink area.
- Dry Completely: Use a clean microfiber cloth to wipe down every surface.
- Air It Out: Leave the cabinet doors open for at least 30 minutes to allow for full air circulation and ensure it’s 100% dry before putting anything back .
- Add a Protective Layer: Consider placing an absorbent mat or a shelf liner on the bottom of the cabinet. This acts as a first line of defense against spills and minor drips from your supplies or plumbing .
Step 4: Smart Organization Strategies
Now comes the fun part: putting it all back together in a way that’s functional and easy to maintain.
- Group Like Items: Instead of just shoving things back in, categorize your supplies. Create zones for daily-use items (dish soap, sponges), specialty cleaners, and tools .
- Choose the Right Tools: The under-sink space is tricky because of the plumbing. Here are a few popular solutions:
- Tension Rods: Hang spray bottles by their triggers on a tension rod, instantly clearing up floor space .
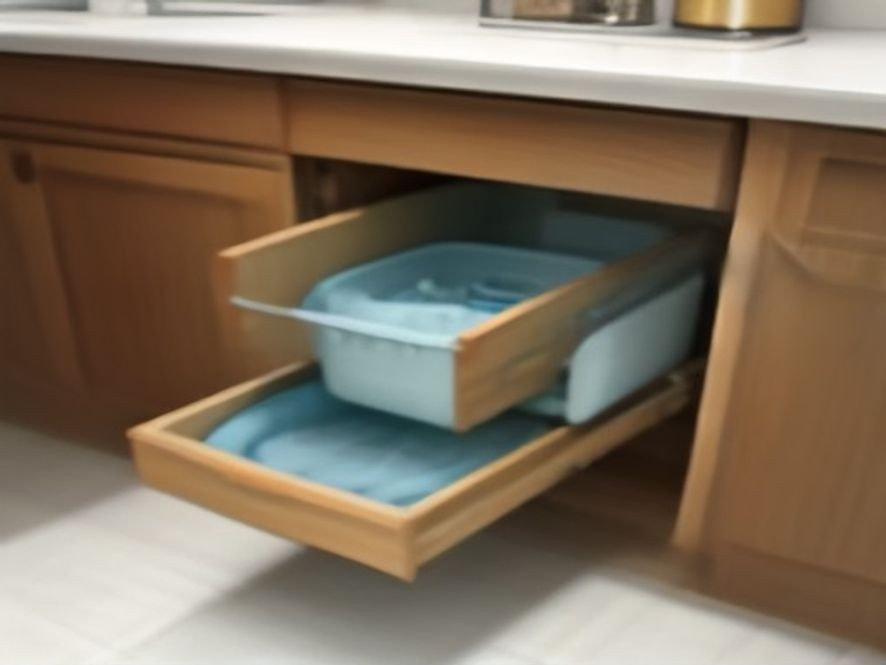
- Pull-Out Drawers: These install on the cabinet floor and slide forward, making it easy to reach items in the back .
- Over-the-Door Racks: Great for storing small items like gloves and sponges, utilizing otherwise wasted space .
- Stackable Bins: Use clear, stackable bins to group supplies and prevent them from toppling over .
Organization Method Comparison Table
| Method | Best For | Effectiveness | Difficulty | Cost |
|---|---|---|---|---|
| Tension Rod | Hanging spray bottles, drying gloves | High (frees floor space) | Easy | Very Low |
| Pull-Out Drawer | Reaching items in the back of deep cabinets | Very High (full access) | Moderate | Moderate |
| Over-the-Door Rack | Storing small, lightweight items | Moderate-High | Easy | Low |
| Stackable Bins | Grouping and containing similar supplies | High (keeps items tidy) | Easy | Low |
| Two-Tier Shelf | Utilizing vertical space for taller items | High | Easy | Moderate |
FAQ: Your Under-Sink Cleaning Questions Answered
How often should I deep clean under my kitchen sink?
Aim to do a full clean and inspection every 3 to 6 months. Regular decluttering and wiping down spills immediately will help in between .
What should I never store under the kitchen sink?
Never store food, pet food, or any other edible items, as moisture can cause mold to grow on them. Also avoid storing paper products that can be easily ruined by water .
What is the best way to organize under the kitchen sink?
Group like items together in bins or baskets. Use tension rods, pull-out drawers, or over-the-door racks to maximize the space around the plumbing .
Why does my under-sink cabinet smell musty?
A musty smell is a sign of mold or mildew growth, usually caused by a small, persistent leak or high humidity. Identify and fix the moisture source immediately .
Is it okay to use vinegar to clean under the sink?
Yes, a 50/50 mixture of white vinegar and water is a great natural cleaner for the inside of most cabinets. However, avoid using acidic cleaners on delicate surfaces like natural stone or matte black finishes .
References
Expert Advice and Practical Guides for Under-Sink Maintenance:
- Tidied: How to Clean Under Kitchen Sink: The Ultimate 2025 Guide
- Cozy Corner at Home: 12 Easy Under Sink Organization Ideas
- Homedit: 8 Things You Should Never Store Under the Kitchen Sink
- Homes and Gardens: How to Declutter Under the Kitchen Sink
Deep cleaning under your kitchen sink might not be the most glamorous chore, but it’s one of the most important for your home’s safety and function. By tackling this often-neglected space, you’re not just organizing—you’re preventing damage, saving money, and creating a healthier kitchen for you and your family.
Which kitchen problem do you want solved next? Share your thoughts in the comments.