How to Store Long Cooking Utensils Without Cluttering the Counter: Smart Organization Solutions
Those extra-long spatulas, whisks, and spoons that keep falling out of your drawer are frustrating—but storing them neatly is easier than you think, and you don’t need a kitchen renovation.
You open your utensil drawer, and it’s a tangled mess. Your extra-long spatula is wedged diagonally, your whisk is stuck, and you can’t find anything. Or worse, they’re all sitting in a crock on your counter, looking messy and taking up valuable space. It’s annoying, and it makes cooking feel chaotic. The good news? There are simple, affordable ways to store long cooking utensils without cluttering your counter.
TL;DR (Too Long; Didn’t Read)
- Main Challenge: Long utensils don’t fit in standard drawers, and countertop crocks take up space and look cluttered.
- Best Solutions: Wall-mounted racks, inside-cabinet door hooks, pull-out drawer organizers, and hanging rails free up counter space.
- Prevention: Group utensils by type, use drawer dividers, and regularly declutter what you don’t use.
- Key Rule: Store utensils close to your cooking area for easy access while you cook.
- Easy Fix: A simple tension rod inside a cabinet can create instant hanging storage for long utensils.
Key Takeaways
- Think Vertical: Use wall space or cabinet doors for storage instead of taking up counter space.
- Measure First: Know the length of your longest utensils before buying any storage solution.
- Group by Use: Keep frequently used utensils within arm’s reach of your stove and less-used ones in deeper storage.
- Declutter Regularly: If you haven’t used a utensil in six months, you probably don’t need it.
- Match Your Kitchen Style: Storage solutions can be functional and attractive—choose what fits your space.
The Real Causes Behind Cluttered Utensil Storage and How to Fix It
Your kitchen counters and drawers are prime real estate. Long utensils—think spatulas, ladles, whisks, pasta servers, and tongs—are notoriously hard to store. They don’t fit in most standard drawers, and countertop crocks can look messy and collect dust.
Why Long Utensils Are Hard to Store
Problem 1: Standard Drawers Are Too Shallow
Most kitchen drawers are 18-24 inches deep. Your long spatula or whisk is often 14-18 inches long. When you put them in a drawer diagonally, they get tangled with other utensils and are hard to find.
Problem 2: Countertop Crocks Are a Magnet for Clutter
A crock on the counter seems like a simple solution. But they tend to collect dust, look messy when full of different shapes and sizes, and take up precious counter space. Plus, reaching into a crowded crock can be awkward.
Problem 3: Utensils Get Lost in Deep Drawers
If you have deep drawers, utensils get buried under other items. You end up digging around, which is frustrating and time-consuming.
Problem 4: No Dedicated Storage Spot
Without a designated home for long utensils, they end up leaning against the backsplash, stuffed in a drawer, or lying loose on the counter. This creates visual clutter and makes the kitchen feel disorganized.
Problem 5: Overbuying and Hoarding
It’s easy to accumulate utensils over time. You buy a new spatula, a fancy whisk, a specialty spoon. Before you know it, you have more utensils than you actually use.
Step-by-Step Guide: The Best Storage Solutions for Long Utensils
Here are the most effective ways to store long cooking utensils without cluttering your counter.
Method 1: Wall-Mounted Racks or Rails (Best for Frequent Use)
A wall-mounted rack or rail is one of the most space-efficient solutions. It keeps utensils visible, accessible, and off the counter.
Step 1: Choose a wall or cabinet side near your stove. Measure the available wall space.
Step 2: Purchase a magnetic knife bar or a slotted utensil rail with hooks. Make sure it’s long enough to hold all your frequently used utensils.
Step 3: Install the rail using wall anchors or screws. Follow the manufacturer’s instructions carefully.
Step 4: Hang utensils by their handles. Group them by type—spatulas together, ladles together, etc.
Step 5: Leave space between utensils for easy grab-and-go access.
Pro Tip: Install the rail at eye level or slightly below so you can easily see and grab what you need without reaching.
Method 2: Inside-Cabinet Door Storage (Great for Hidden Organization)
If you don’t want utensils visible, inside-cabinet door storage is a game-changer.
Step 1: Open a cabinet door near your stove. Measure the inside of the door.
Step 2: Purchase an over-the-door rack or a stick-on hook system designed for cabinet doors.
Step 3: Install the rack according to the manufacturer’s instructions. Most are simple to install without tools.
Step 4: Hang your long utensils by their handles. Close the door—utensils are hidden but easily accessible when you open the door.
Step 5: Ensure the utensils don’t interfere with the cabinet closing. Adjust hook placement as needed.
Pro Tip: Use adhesive hooks on the inside of cabinet doors for a no-drill solution. Just make sure they’re strong enough to hold the weight.
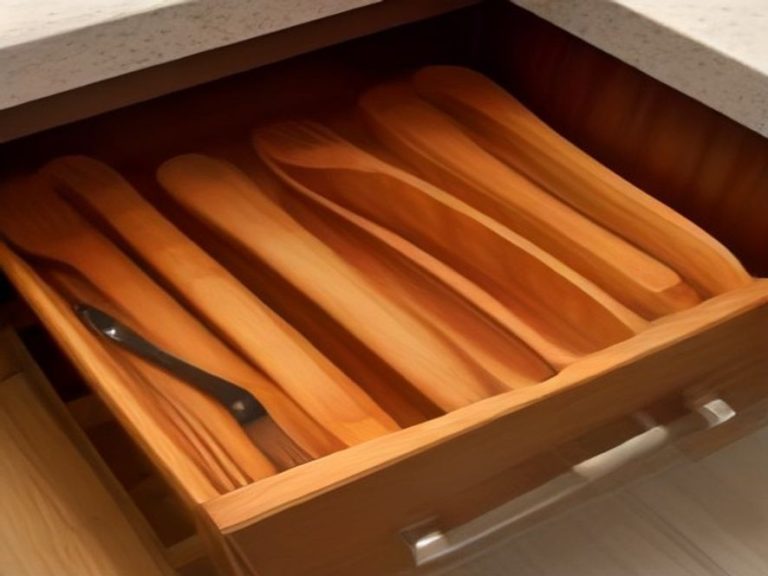
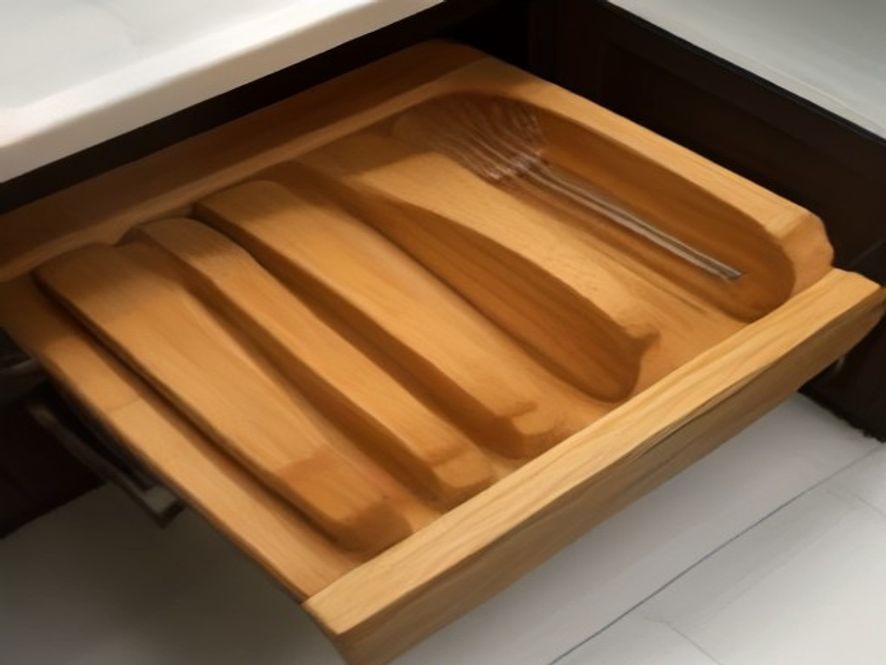
Method 3: Drawer Dividers and Organizers (For Deep Drawers)
If you have deep drawers, you can customize them to fit long utensils.
Step 1: Measure the inside of your drawer. Know the depth and width.
Step 2: Purchase adjustable drawer dividers or a bamboo utensil organizer.
Step 3: Arrange dividers to create long, narrow compartments that fit your longest utensils.
Step 4: Place utensils in their designated compartments. Group by type and size.
Step 5: Keep this drawer close to your stove for easy access while cooking.
Pro Tip: If your drawer isn’t deep enough for long utensils, consider installing a pull-out drawer organizer that extends outward.
Method 4: Countertop Rotating Caddy (For Small Spaces)
A rotating caddy is a good compromise if you prefer countertop storage but want to minimize clutter.
Step 1: Choose a narrow, tall utensil caddy with compartments. Make sure it’s the right size for your utensils.
Step 2: Place it on the counter near your stove but out of the main workspace.
Step 3: Group utensils by function—cooking utensils in one section, serving utensils in another.
Step 4: Only keep your most-used items in the caddy. Store less-used utensils elsewhere.
Step 5: Rotate the caddy to access different items easily.
Pro Tip: Choose a caddy with a removable, dishwasher-safe insert for easy cleaning.
Method 5: Magnetic Strips (For Metal Utensils)
If you have metal utensils, a magnetic strip is a sleek, space-saving solution.
Step 1: Choose a magnetic strip strong enough to hold your utensils. Wall-mounted strips work best.
Step 2: Install the strip near your stove or prep area.
Step 3: Attach your metal utensils by their handles or blades. The magnetic force will hold them securely.
Step 4: Arrange them in order of frequency of use.
Pro Tip: Make sure the strip is installed securely into wall studs or with heavy-duty wall anchors to prevent it from falling.
Method 6: The Tension Rod Hack (No-Drill Solution)
This is a clever, low-cost solution that uses a tension rod inside a cabinet.
Step 1: Open a cabinet near your stove. Measure the width of the cabinet opening.
Step 2: Purchase a tension rod that fits the width. Shower curtain rods work well for this.
Step 3: Install the tension rod horizontally inside the cabinet, near the top or middle.
Step 4: Use S-hooks or binder clips to hang your long utensils by their handles.
Step 5: Close the cabinet door—utensils are hidden and organized.
Pro Tip: This is a renter-friendly solution that requires no drilling or permanent modifications.
Comparison Table: Utensil Storage Solutions
| Method | Pros | Cons | Best For | Cost |
|---|---|---|---|---|
| Wall-Mounted Rail | Visible, accessible, off-counter. | Requires drilling, visible clutter. | Frequent-use utensils. | Low-Medium |
| Inside Cabinet Door | Hidden, no counter space. | Door may not close fully. | Everyday utensils. | Low-Medium |
| Drawer Dividers | Clean, organized, protected. | Requires deep drawer. | All utensils. | Low-Medium |
| Rotating Caddy | Easy access, compact. | Takes counter space. | Small kitchens. | Low-Medium |
| Magnetic Strip | Sleek, space-saving, modern. | Only works for metal. | Metal utensils. | Low-Medium |
| Tension Rod & Hooks | No-drill, cheap, hidden. | Limited weight capacity. | Renters, light utensils. | Very Low |
| Hanging Pot Rack | Multi-functional, rustic look. | Requires ceiling space. | Large kitchens. | Medium-High |
Step-by-Step Guide: How to Declutter Your Utensils First
Before you buy any storage solution, take time to declutter. This is the most important step.
Step 1: Pull out all your utensils. Lay them on the counter.
Step 2: Sort by type: spatulas, ladles, whisks, spoons, tongs, specialty tools.
Step 3: Ask yourself:
- Have I used this in the last six months?
- Do I have duplicates?
- Does this have a specific function that no other utensil can do?
Step 4: Donate or discard utensils you don’t need. Keep only what you actually use.
Step 5: Clean the remaining utensils before storing them.
Step 6: Group the utensils you’re keeping into two categories:
- Everyday Use: Keep these in the most accessible spot.
- Occasional Use: Store these in a less accessible spot.
Frequently Asked Questions (FAQ)
How do I store long utensils without a drawer or cabinet?
Use a wall-mounted rail, magnetic strip, or a tension rod with hooks inside a cabinet. These solutions require minimal space and keep utensils accessible .
What’s the best way to organize utensils in a drawer?
Use adjustable drawer dividers or bamboo organizers to create long compartments. Group utensils by type and store them vertically for easy access .
How do I store spatulas and spoons neatly?
Store them in a wall-mounted rail, on hooks inside a cabinet, or in a narrow utensil caddy. Group them by size and function for easy grabbing .
What should I do with utensils I rarely use?
Store them in a separate drawer, a bin in a cabinet, or on a less accessible shelf. If you haven’t used them in six months, consider donating them .
Can I store utensils in the oven drawer?
It’s not recommended unless the drawer is specifically designed for storage. The oven drawer gets hot during baking, which can damage wooden utensils and melt plastic .
How do I stop my utensils from getting tangled?
Use dividers, separate compartments, or hooks to keep utensils from touching each other. Hanging them individually also prevents tangling .
What is the best storage solution for a small kitchen?
A wall-mounted rail or magnetic strip uses no counter space and makes utensils easily accessible. Inside-cabinet door storage is another great option for hiding clutter .
References
Expert Advice on Kitchen Organization and Utensil Storage
- The Spruce: 14 Ways to Organize Kitchen Utensils
- Better Homes & Gardens: How to Organize Kitchen Utensils
- Real Simple: The Best Utensil Organizers
- Food Network: How to Organize Your Utensils
- Apartment Therapy: Genius Kitchen Utensil Storage Ideas
Which kitchen problem do you want solved next? Share your thoughts in the comments.