Kitchen Plumbing & Drain System Fix Guide: Sink, Pipes & Water Flow Issues
You turn on the faucet to fill a pot for pasta, but the water trickles out slowly. Then you pull the plug, and the dirty water barely moves. Then you notice a small puddle under the sink. Suddenly, your simple dinner feels like a plumbing emergency.
TL;DR
Most kitchen plumbing problems fall into three categories: low water pressure (clogged aerator or supply line), slow or clogged drains (grease buildup or P-trap blockage), and leaks (loose connections or worn seals). Each has a simple DIY fix that takes under 30 minutes. This guide walks you through diagnosing the problem, fixing it with basic tools, and preventing it from happening again. You can solve 90 percent of kitchen plumbing issues yourself without calling a plumber.
Key Takeaways
- Low water pressure usually means a clogged aerator (the screw-on tip of the faucet) — clean it with vinegar.
- Slow draining means a partial clog — start with the sink strainer, then plunge, then clean the P-trap.
- Leaks under the sink are almost always loose slip nuts or worn supply lines — tighten or replace.
- Never pour chemical drain cleaners down a clogged sink — they damage pipes and rarely work on full clogs.
- Grease is the number one drain killer — pour it into a jar and throw it in the trash, never down the sink.
- Most plumbing fixes require only an adjustable wrench, a bucket, and 20 minutes of patience.
Part 1: Low Water Pressure (Faucet Runs Slowly)
You turn the handle, and the water comes out in a weak, sad trickle instead of a strong stream. Here is why and how to fix it.
Cause 1: Clogged Aerator (Most Common)
The aerator is the small screw-on tip at the end of your faucet. It mixes air with water to prevent splashing. Over time, mineral deposits (from hard water) and tiny debris clog the small screen inside.
Signs it is the aerator:
- Both hot and cold water are slow
- The spray is uneven or splashes strangely
- The problem started suddenly
- Other faucets in the house have normal pressure
Step-by-step fix:
- Unscrew the aerator from the faucet tip by hand. If it is stuck, use pliers with a cloth (to prevent scratching).
- Pull out the small screen and rubber washer inside.
- Rinse everything under running water.
- Soak the screen in white vinegar for 10-15 minutes to dissolve mineral deposits.
- Scrub with an old toothbrush.
- Rinse, reassemble, and screw back on hand-tight.
- Test the water pressure.
Clean your aerator every 6 months to prevent buildup. Hard water areas may need every 3 months.
Cause 2: Clogged Supply Lines
Under your sink, flexible metal or plastic hoses bring water from the shutoff valves to the faucet. These hoses have small screens at the connections that can clog.
Signs it is a supply line:
- Only hot water is slow, or only cold water is slow
- Other faucets in the house have normal pressure
- The aerator is clean but pressure is still low
Step-by-step fix:
- Turn off the hot and cold shutoff valves under the sink (turn clockwise).
- Open the faucet to release pressure (a small amount of water will come out).
- Place a bucket under the supply line connections.
- Disconnect the supply line from the faucet (not from the valve) using an adjustable wrench.
- Look inside the hose end. You will see a small screen or washer.
- Clean the screen with a toothbrush. Soak in vinegar if mineral buildup is present.
- Reconnect the supply line. Hand-tighten, then give it a quarter turn with a wrench.
- Turn the shutoff valves back on slowly. Check for leaks. Test pressure.
Cause 3: Partially Closed Shutoff Valve
The small valves under your sink can get bumped partially closed. This restricts water flow.
Signs it is a valve:
- The problem started after someone was under the sink
- Both hot and cold are slow, but not equally slow
- The aerator and supply lines are clean
Step-by-step fix:
- Go under the sink and find the two shutoff valves (hot on left, cold on right).
- Turn both valves counterclockwise as far as they will go.
- Do not force them — if they stop, they are fully open.
- Test the faucet.
Cause 4: Low House Water Pressure
If every faucet, shower, and hose in your house has low pressure, the problem is not your kitchen — it is your whole house.
Possible causes:
- Main water valve partially closed (near your water meter)
- Pressure regulator failed (if you have one)
- Leak in the main supply line
- Municipal water issue (ask neighbors)
What to do: Call a plumber. Whole-house pressure issues are not DIY for most homeowners.
Part 2: Slow or Clogged Drain (Water Pools in Sink)
Water should drain in 5-10 seconds after you turn off the tap. If it takes 30 seconds or more, you have a partial clog. If water does not drain at all, you have a complete clog.
The Drain Cleaning Hierarchy (Try in This Order)
| Step | Method | Success Rate | Time |
|---|---|---|---|
| 1 | Clean the sink strainer | High (if strainer is dirty) | 30 seconds |
| 2 | Plunge the sink | Medium-high | 5 minutes |
| 3 | Clean the P-trap | Very high | 15 minutes |
| 4 | Baking soda + vinegar | Medium | 20 minutes |
| 5 | Drain snake | High | 30 minutes |
| 6 | Call a plumber | 100% | Varies |
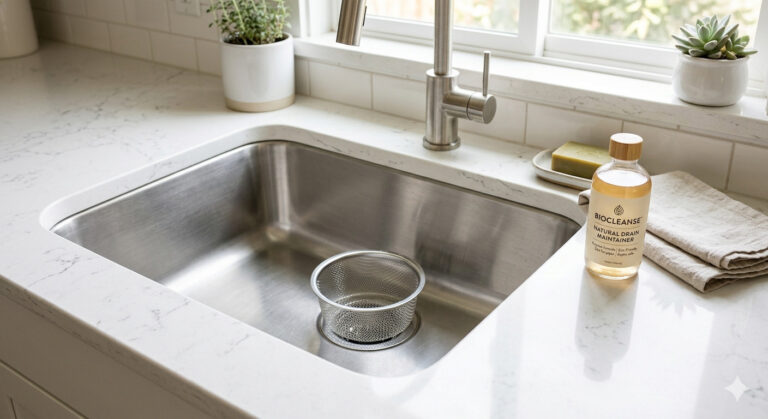
Step 1: Clean the Sink Strainer (30 seconds)
This sounds too simple, but it fixes a shocking number of “slow drain” complaints.
What to do:
- Lift the metal strainer basket out of the drain.
- Dump any debris into the trash.
- Scrub the strainer with dish soap and a brush.
- Scrub the drain opening itself.
- Put the strainer back. Test the drain.
Step 2: Plunge the Sink (5 minutes)
Plunging uses pressure to push the clog through or break it up.
What to do:
- Remove the strainer so the drain is fully open.
- Fill the sink with 2 inches of water — enough to cover the plunger cup.
- If you have a double sink, seal the other drain with a wet rag or the stopper.
- Place the plunger directly over the drain.
- Pump vigorously up and down 15-20 times. Do not break the seal.
- Pull the plunger straight up quickly.
- Watch the water drain. If it flows, run hot water for 1 minute to flush.
Repeat 2-3 times if needed.
Step 3: Clean the P-Trap (15 minutes)
The P-trap is the curved pipe under your sink. It catches debris that falls down the drain. Cleaning it solves most clogs.
What you need: Bucket, towels, adjustable wrench or pliers, old toothbrush.
Step-by-step:
- Place a bucket directly under the P-trap.
- Put old towels on the cabinet floor — water will spill.
- Loosen the slip nuts by hand. If stuck, use pliers gently (plastic nuts crack easily).
- Slide the P-trap off and dump the contents into the bucket.
- Scrub the inside of the P-trap with an old toothbrush under running water.
- Scrub the pipe openings (the one coming from the sink and the one going to the wall).
- Reattach the P-trap. Hand-tighten the slip nuts, then give a quarter turn with pliers.
- Run hot water for 2 minutes and test.
Always unplug the garbage disposal before putting your hands near the drain.
Step 4: Baking Soda and Vinegar (20 minutes)
This natural method dissolves grease and organic buildup without damaging pipes.
What to do:
- Remove the P-trap (or leave it off if already removed).
- Pour 1/2 cup baking soda into the pipe going into the wall.
- Immediately pour 1 cup white vinegar.
- Cover the pipe opening with a wet rag.
- Wait 15 minutes while the fizzing reaction scrubs the pipe.
- Flush with 2 quarts of hot tap water (not boiling if you have PVC pipes).
- Reattach the P-trap. Test the drain.
Step 5: Use a Drain Snake (30 minutes)
If the clog is deeper than the P-trap, you need a drain snake (also called an auger).
What to do:
- Remove the P-trap completely.
- Insert the snake into the pipe going into the wall.
- Crank the handle while pushing forward slowly.
- When you hit resistance, you have found the clog. Crank and push to break through.
- Pull the snake back out slowly. It will bring back debris.
- Repeat 2-3 times until the snake comes back clean.
- Flush with hot water. Reattach the P-trap. Test.
For a kitchen sink: A 15-25 foot snake is usually enough. Do not force the snake if it gets stuck — you can puncture old pipes.
What to Never Put Down Your Drain
| Item | Why It Causes Clogs |
|---|---|
| Cooking grease, oil, bacon fat | Solidifies in pipes, narrows the pipe |
| Coffee grounds | Packs together like wet sand |
| Pasta, rice, oatmeal | Expands with water, turns into paste |
| Eggshells | Membrane wraps around disposal |
| Flour or batter | Turns into glue inside pipes |
| Fibrous vegetables (celery) | Strings wrap around disposal |
| Paint or chemicals | Damages pipes and environment |
| Potato peels | Starch turns into sticky paste |
Part 3: Leaks Under the Sink
You open the cabinet and see water droplets, a puddle, or wet wood. Do not panic. Most under-sink leaks are easy fixes.
Leak Location Guide
| Where Water Is | Most Likely Cause |
|---|---|
| Dripping from the P-trap | Loose slip nut or worn washer |
| Dripping from the supply line connection | Loose nut or worn rubber hose |
| Dripping from the shutoff valve stem | Worn valve packing or failed valve |
| Water pooling around the garbage disposal | Loose disposal mounting ring or worn seal |
| Water running down the drain pipe from above | Leaky faucet base or loose faucet connections |
Fix 1: Loose Slip Nut on P-Trap
What to do:
- Place a towel under the leak.
- Hand-tighten the slip nut. If it is already tight, it may need a new washer.
- If tightening does not work, unscrew the nut, remove the old washer, install a new one, and retighten.
Fix 2: Leaking Supply Line Connection
What to do:
- Turn off the shutoff valve (clockwise).
- Place a bucket under the connection.
- Disconnect the supply line using an adjustable wrench.
- Check the rubber washer inside the hose end. If it is cracked or flattened, replace it.
- Reconnect and tighten. Hand-tighten plus a quarter turn with a wrench.
- Turn the water back on slowly. Check for leaks.
Fix 3: Leaking Shutoff Valve (From the Handle or Stem)
What to do:
- If the leak is coming from the handle when the valve is open, try tightening the packing nut (the nut right behind the handle) a quarter turn.
- If that does not work or the valve is old, replace the entire shutoff valve.
- Turn off the main water valve to the house before replacing.
Call a plumber if: You are not comfortable replacing the valve or the main water valve does not turn off fully.
Fix 4: Garbage Disposal Leaking
Disposals leak from three places:
| Leak Location | Cause | Fix |
|---|---|---|
| Top (where disposal meets sink) | Loose mounting ring | Tighten the mounting ring with a screwdriver or disposal wrench |
| Middle (seam where disposal halves meet) | Worn internal seal | Replace disposal (seal cannot be repaired) |
| Bottom (where drain hose connects) | Loose hose clamp | Tighten clamp or replace hose |
If the disposal leaks from the middle seam, replace it. You can buy a new disposal for $80-150 and install it yourself in about an hour.
Part 4: Garbage Disposal Problems
Your disposal hums but does not grind. Or it does not turn on at all. Or it leaks. Here is how to fix it.
Problem: Disposal Hums but Does Not Spin
This means the disposal is getting power, but the blades are jammed.
Step-by-step fix:
- Turn off the disposal. Unplug it or turn off the circuit breaker.
- Locate the hex hole in the center of the disposal bottom (some have a red or black cover that pops off).
- Insert the Allen wrench (hex key) that came with the disposal (usually 1/4 inch). If you lost it, buy one at a hardware store.
- Turn the wrench back and forth to free the jam.
- Once the blades spin freely, remove the wrench. Press the red reset button on the bottom of the disposal.
- Plug it back in. Run cold water and turn on the disposal.
Problem: Disposal Does Not Turn On at All
Check in this order:
- Make sure it is plugged in (check under the sink).
- Press the red reset button on the bottom.
- Check the circuit breaker in your electrical panel.
- If none of these work, the disposal motor may be dead. Replace the disposal.
Problem: Disposal Leaks from the Reset Button
This means the internal seal has failed. Replace the disposal. Do not try to repair it.
How to Replace a Garbage Disposal (In Brief)
- Turn off power and water. Disconnect the drain hose and supply line.
- Loosen the mounting ring under the sink. The old disposal will drop out.
- Remove the mounting assembly from the sink (it stays in place).
- Install the new disposal’s mounting assembly (some disposals use the same one).
- Hang the new disposal on the mounting ring and tighten.
- Reconnect the drain hose and supply line.
- Run water and check for leaks. Press reset button. Test.
Part 5: Prevention (Keep Your Plumbing Happy)
These habits take almost no time and prevent 90 percent of kitchen plumbing problems.
Daily Habits
- Scrape plates into the trash before rinsing. Every scrap in the trash is a scrap that cannot clog your pipes.
- Run cold water for 10 seconds after using the disposal. Cold water keeps grease solid so it gets chopped.
- Pour a kettle of hot tap water down the drain at the end of the day.
Weekly Habits
- Clean the sink strainer thoroughly with a brush.
- Run the disposal with ice and citrus (see disposal cleaning above).
Monthly Habits
- Baking soda and vinegar drain flush (see Step 4 above).
- Remove and inspect the P-trap — takes 10 minutes.
- Check under the sink for leaks — look at all connections.
What to Never Pour Down the Drain
| Do Not Pour | Instead |
|---|---|
| Cooking grease | Pour into a jar, freeze, throw in trash |
| Coffee grounds | Compost or trash |
| Eggshells | Compost or trash |
| Pasta water (with starch) | Pour into yard or compost |
| Chemical drain cleaners | Use a snake or baking soda/vinegar |
| Paint or solvents | Household hazardous waste facility |
Comparison: Drain Cleaning Methods
| Method | Best For | Effectiveness | Pipe Damage Risk | Cost | DIY Difficulty |
|---|---|---|---|---|---|
| Clean strainer | Debris at drain opening | High (if strainer is dirty) | None | Free | Very easy |
| Plunger | Soft clogs near drain | Good | None | Free (if you own one) | Easy |
| Clean P-trap | Debris in the trap | Excellent | Low | Free | Easy |
| Baking soda + vinegar | Grease and organic buildup | Good | None | $1-2 | Very easy |
| Drain snake | Deep clogs, solid debris | Very good | Low (if used gently) | $10-20 (tool) | Moderate |
| Hydro-jetting (pro) | Severe grease, deep clogs | Excellent | Very low | $250-500 | Not DIY |
| Chemical drain cleaner | Almost nothing | Poor | High (corrodes pipes) | $5-15 | Easy (but dangerous) |
Never use chemical drain cleaners in a fully clogged sink. The chemicals sit on top of the water and can splash back at you.
FAQ: Kitchen Plumbing Questions
Why does my kitchen sink drain slowly even after cleaning the P-trap?
The clog is deeper in the wall or main line. Use a drain snake (15-25 feet). If that does not work, call a plumber — you may have a main line issue.
How do I know if my garbage disposal is jammed or burned out?
A jammed disposal hums but does not spin. A burned-out disposal makes no sound at all (and the reset button does not help). Try the Allen wrench trick first.
Can I pour boiling water down a PVC drain pipe?
No. Boiling water can soften PVC pipe joints and cause leaks. Use the hottest water from your tap (120-140°F) instead.
Why does my sink gurgle when water drains?
Gurgling means air is trapped in the pipe. This usually indicates a partial clog or a venting problem. Clean your drain. If gurgling continues when other fixtures drain, your vent pipe may be blocked.
How often should I replace the supply lines under my sink?
Every 5 years. Rubber supply lines can burst without warning. Replace them with braided stainless steel lines — they last longer and are safer.
What is that black slime in my drain and disposal?
That is a bacterial biofilm. It is harmless but smelly. Clean it with baking soda and vinegar, or scrub it with a toothbrush under the rubber splash guard.
When should I call a plumber instead of DIY?
Call a plumber if: you have tried everything and the drain is still slow, water is backing up into other fixtures, you smell gas, you cannot stop a leak, or you are not comfortable working under the sink.
Putting It All Together
Kitchen plumbing problems feel urgent because water is involved. But most are simple fixes that take under 30 minutes.
Start with the easiest possible fix for your symptom:
- Low pressure? Clean the aerator.
- Slow drain? Clean the strainer, then plunge, then clean the P-trap.
- Leak? Tighten the loose connection or replace the worn washer.
Never pour grease down the drain. Never use chemical drain cleaners. Always keep a bucket and towels under the sink for emergencies.
The best plumbing repair is prevention. Scrape plates. Run hot water. Clean the P-trap every 6 months. Your pipes will thank you.
Now go fix that drip. You have got this.
Which kitchen problem do you want solved next? Share your thoughts in the comments.
References: