Beginner Kitchen Essentials for New Homeowners: Your First Kitchen, Done Right
You just got the keys to your first home. The boxes are everywhere, the takeout menus are piling up, and you are standing in your empty kitchen realizing that — somehow — you are an adult now, and adults are supposed to know what kitchen tools they actually need.
TL;DR: New homeowners do not need to buy everything at once. Start with the absolute essentials: a chef’s knife, cutting board, nonstick skillet, medium pot, spatula, wooden spoon, colander, sheet pan, mixing bowls, measuring cups and spoons, can opener, and a few basic utensils. That is about 150 to 200 dollars. Cook for a month. Notice what frustrates you. Then add tools one at a time. Also remember the non-glamorous essentials that first-time homeowners forget: a fire extinguisher, smoke and carbon monoxide detectors, trash can, dish drying rack, dish soap and sponges, and basic cleaning supplies.
The First-Time Homeowner Reality Check
Owning a home is different from renting. In an apartment, the previous tenant probably left behind a few things — a random spatula, maybe a can opener, definitely some mystery stains. In your own home, you are starting from zero. Every drawer is empty. Every cabinet is bare.
This is exciting. It is also overwhelming. The good news is that you do not need to fill those drawers and cabinets overnight. The bad news is that if you go to a kitchen supply store without a plan, you will walk out with an avocado slicer, a garlic press, and a 400-dollar knife block — and still have no way to boil water.
Start small. Cook simple meals. Add tools slowly. The best kitchen is not the one with the most gadgets — it is the one where you can actually find what you need when you need it.
Phase 1: The Absolute Essentials (Buy These First)
These are the tools that let you cook real food. With these 12 items, you can make eggs, pasta, stir-fry, soup, roasted vegetables, rice, and dozens of other meals. Buy these before you buy anything else.
1. Chef’s Knife (8-inch)
You will use this more than any other tool in your kitchen. Chopping onions, slicing vegetables, cutting meat, smashing garlic. Do not buy a knife block. Do not buy a set. Buy one good chef’s knife.
What to look for:
- Forged construction (stronger than stamped)
- Full tang (metal runs through the handle)
- Comfortable grip (hold it before buying)
- Good beginner brands: Victorinox, Mercer, J.A. Henckels (entry level)
Budget option: Victorinox Fibrox Pro 8-inch chef’s knife — about 45 dollars. Professional chefs recommend it for beginners because it is sharp, durable, and affordable.
Safety reminder: A dull knife is more dangerous than a sharp one. Learn to use a pull-through sharpener (10 to 15 dollars). Hand wash your knife — dishwashers ruin the blade and handle.
2. Cutting Board
Your chef’s knife needs a good partner. A cutting board protects your knife and gives you room to work.
What to look for:
- Wood or bamboo (gentle on knife edges)
- At least 12 inches by 18 inches (big enough for most tasks)
- Thick enough not to slide (or put a damp paper towel under it)
Budget option: Bamboo cutting board from a discount store — 10 to 15 dollars.
Sanitation tip: Buy two cutting boards if you cook meat. One for raw meat (use a plastic board that can go in the dishwasher). One for everything else.
3. Large Skillet (10 or 12 inches, Nonstick)
Eggs, stir-fry, searing meat, sautéing vegetables, frying pancakes. Your skillet is the workhorse of your stovetop. Nonstick is the most forgiving for beginners.
What to look for:
- Nonstick coating (easier to clean, food does not stick)
- Oven-safe to 400 degrees (if you want to finish cooking in the oven)
- Comfortable, heatproof handle
Budget option: T-fal nonstick skillet — 20 to 30 dollars.
Note: Nonstick pans wear out after two to three years. That is normal. Do not spend a lot of money on nonstick — they all wear out.
Care tip: Hand wash only. Use silicone or wooden utensils — metal scratches the coating.
4. Medium Pot (3 to 4 quarts with lid)
Boiling pasta, cooking rice, making soup, simmering sauce, steaming vegetables. A medium pot handles almost everything a pot needs to do.
What to look for:
- Stainless steel (durable, heats evenly)
- Lid that fits tightly
- Heatproof handle
Budget option: Farberware or T-fal stainless steel pot — 20 to 30 dollars.
5. Spatula (Slotted and Solid)
You need to flip food. You need to lift food. You need to turn food. A spatula does all of this.
What to look for:
- Heat-resistant silicone or nylon (safe for nonstick pans)
- Slotted spatula (lets oil drain through)
- Solid spatula (for pancakes, eggs, fish)
Budget option: Two-pack of silicone spatulas — 8 to 12 dollars.
What to avoid: Metal spatulas on nonstick pans. They scratch the coating.
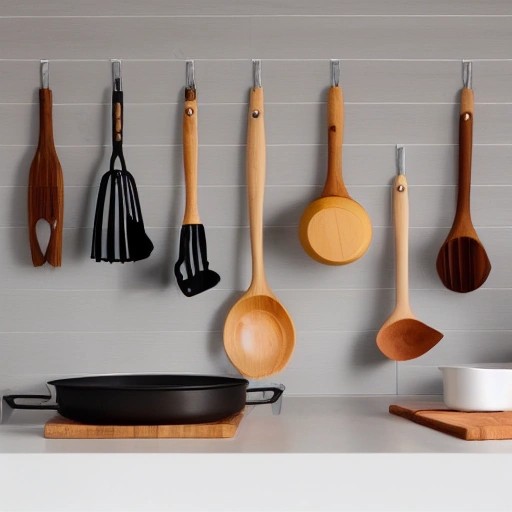
6. Wooden Spoon
Simple. Cheap. Indestructible. A wooden spoon stirs sauces, breaks up ground meat, scrapes browned bits from the pan, and never scratches your cookware.
What to look for:
- One-piece wood (no separate handle to break)
- Smooth surface (sanded, not rough)
- Long enough to keep your hand away from heat
Budget option: A single wooden spoon — 2 to 5 dollars.
7. Colander
Draining pasta, rinsing vegetables, washing fruit, straining canned beans. A colander is simple but essential.
What to look for:
- Sturdy base (does not tip over)
- Small feet (allows water to drain underneath)
- Dishwasher safe
Budget option: Basic plastic or metal colander — 5 to 10 dollars.
8. Sheet Pan (Rimmed Baking Sheet)
Roasted vegetables, sheet pan dinners, cookies, bacon in the oven, cooling cookies, toasting nuts. A rimmed sheet pan is incredibly versatile.
What to look for:
- Rimmed edges (so juices do not drip off)
- 18 inches by 13 inches (standard half-sheet size)
- Heavy gauge (warp-resistant)
Budget option: Nordic Ware half-sheet pan — 15 to 20 dollars (lasts for years).
9. Mixing Bowls (Set of Three)
Mixing ingredients, holding prepped vegetables, marinating meat, serving salad, storing leftovers temporarily.
What to look for:
- Nesting set (they store inside each other)
- Glass or stainless steel (both durable)
- At least three sizes: small, medium, large
Budget option: Stainless steel nesting bowls — 15 to 25 dollars.
10. Measuring Cups and Spoons
Cooking requires some accuracy. Baking requires exact accuracy. You need both dry and liquid measuring cups plus measuring spoons.
What to look for:
- Dry measuring cups: metal or heavy plastic, nested set (1/4, 1/3, 1/2, 1 cup)
- Liquid measuring cup: glass, 2-cup size, clear markings
- Measuring spoons: metal, nested set (1/4 tsp, 1/2 tsp, 1 tsp, 1 Tbsp)
Budget option: Basic plastic or metal sets — 5 to 10 dollars total.
11. Can Opener (Manual)
You will open canned tomatoes, beans, broth, tuna, and coconut milk regularly. A simple manual can opener does the job.
What to look for:
- Manual (electric ones break and take up counter space)
- Smooth-turning mechanism
- Rubber-coated handles for grip
Budget option: Basic manual can opener — 5 to 10 dollars.
12. Kitchen Shears (Scissors)
Cutting herbs, snipping chicken, opening packaging, trimming fat, cutting pizza. Kitchen shears are scissors designed for food.
What to look for:
- Come apart for cleaning (food gets trapped in the hinge)
- Sturdy blades
- Comfortable handles
Budget option: KitchenAid all-purpose kitchen shears — 8 to 12 dollars.
Phase 2: The “Oops, I Forgot” Essentials
These are the non-glamorous items that first-time homeowners forget. They are not exciting. But you will miss them immediately if you do not have them.
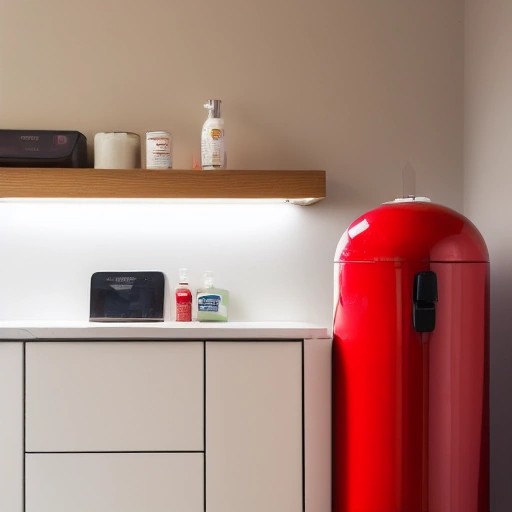
13. Fire Extinguisher (ABC Rated)
This is not optional. A kitchen fire is the most common household fire, and grease fires cannot be put out with water.
What to look for:
- Rated for Class A, B, and C fires
- Mount it near the kitchen entrance (not under the sink or right next to the stove)
- Check the pressure gauge monthly
Budget option: First Alert kitchen fire extinguisher — 25 to 35 dollars.
Safety reminder: Learn the PASS method: Pull the pin, Aim at the base of the fire, Squeeze the handle, Sweep side to side.
14. Smoke and Carbon Monoxide Detectors
Your new home should have these already. Test them the day you move in. If they are old (more than 10 years), replace them.
What to look for:
- Smoke detector within 10 to 20 feet of the kitchen
- CO detector on every floor, especially near sleeping areas
- Replace batteries twice a year
Budget option: Basic combo smoke/CO detector — 20 to 40 dollars.
15. Trash Can with a Lid
You will generate more kitchen trash than you expect. A can with a lid keeps smells contained and pests out.
What to look for:
- Step pedal (so you do not have to touch the lid with dirty hands)
- Removable inner bucket for easy cleaning
- At least 10 gallons
Budget option: Simplehuman or generic step can — 30 to 60 dollars.
16. Dish Drying Rack
Unless you have a dishwasher and plan to run it every single day, you need a place for wet dishes to dry.
What to look for:
- Dish-draining tray (protects your counter from water)
- Cup holder and utensil caddy
- Over-the-sink roll-up racks save counter space
Budget option: Basic wire drying rack — 10 to 20 dollars.
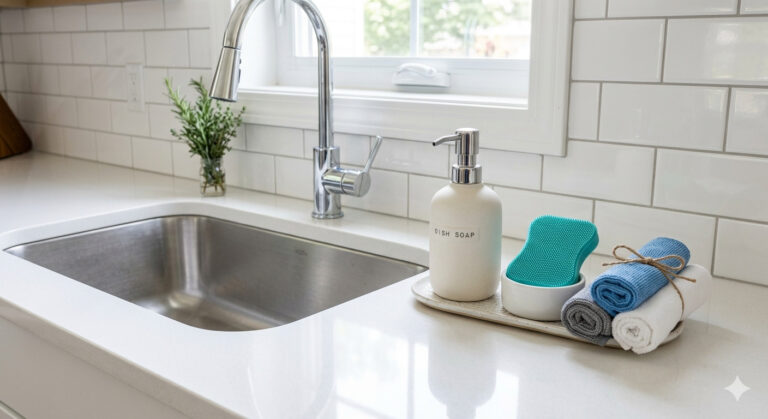
17. Dish Soap and Sponges
Obvious, but easy to forget when you are overwhelmed with moving boxes.
What to buy:
- Dawn dish soap (the blue one — it cuts grease best)
- A few good sponges (scrubber on one side, soft on the other)
- A dish brush with a handle (keeps your hands out of dirty water)
Budget option: Generic soap works, but Dawn is worth the extra dollar.
18. All-Purpose Cleaner and Paper Towels
You will spill things. You will splatter things. You will need to wipe things down.
What to buy:
- A spray bottle of all-purpose cleaner (or make your own with vinegar and water)
- Paper towels (one roll on the counter, extras in a cabinet)
- Microfiber cloths (reusable, better for the environment)
Budget tip: Mix equal parts white vinegar and water in a spray bottle. Add a few drops of dish soap. Best all-purpose cleaner you will ever use, and it costs pennies.
19. Dish Towels (At Least 6)
You will reach for a towel constantly: drying your hands, wiping spills, grabbing hot handles, lining a bread basket. Buy more than you think you need.
What to look for:
- 100 percent cotton (absorbs better than blends)
- Medium weight (thin towels wear out quickly)
- Dark colors (hide stains better)
Budget option: Bulk packs from discount stores — 10 to 15 dollars for a 6-pack.
20. Basic First Aid Kit
Kitchen injuries happen. Small cuts from knives, minor burns from hot pans. Be prepared.
What your kitchen first aid kit should include:
- Assorted bandages (fabric, not plastic)
- Antiseptic wipes
- Burn cream or gel
- Antibiotic ointment
- Scissors and tweezers
Budget option: Pre-made first aid kit — 15 to 20 dollars. Add burn gel separately.
Phase 3: The Nice-to-Haves (Buy These Second)
After you have cooked for a month with the essentials, add these tools one at a time. Buy them when you find yourself wishing you had them.
21. Instant-Read Thermometer
The single best tool for preventing overcooked, dried-out meat. Stick it in, read the temperature in 2 seconds. No more cutting into chicken to check if it is done.
Budget option: Taylor digital thermometer — 15 to 20 dollars.
22. Vegetable Peeler
Peeling carrots, potatoes, apples, cucumbers. A Y-peeler is easier to control than a straight peeler.
Budget option: OXO Good Grips Y-peeler — 5 to 8 dollars.
23. Tongs (One Good Pair)
Flipping meat, tossing salad, serving pasta, grabbing hot items from a steamer. Tongs are like an extension of your hand.
Budget option: Silicone-tipped locking tongs — 8 to 12 dollars.
24. Garlic Press
Minced garlic is in almost every savory recipe. A garlic press eliminates peeling and chopping. Squeeze, and minced garlic comes out.
Budget option: Basic metal garlic press — 5 to 10 dollars.
25. Whisk
Making scrambled eggs, salad dressing, gravy, whipped cream, pancake batter. A whisk blends faster than a fork.
Budget option: Basic balloon whisk — 5 to 8 dollars.
26. Storage Containers (One Matching Set)
Leftovers need a home. A matching set of glass or plastic containers with lids saves space and reduces frustration.
What to look for:
- One brand and size range (so lids are interchangeable)
- Clear (so you can see what is inside)
- Stackable
Budget option: Basic plastic set — 15 to 25 dollars. Glass is more durable but more expensive.
The First-Time Homeowner Shopping List (Printable)
Phase 1: Buy these before you cook your first meal
- Chef’s knife (45 dollars)
- Cutting board (12 dollars)
- Large nonstick skillet (25 dollars)
- Medium pot with lid (25 dollars)
- Spatula (silicone, 10 dollars)
- Wooden spoon (4 dollars)
- Colander (7 dollars)
- Sheet pan (16 dollars)
- Mixing bowls (set of 3, 18 dollars)
- Measuring cups and spoons (8 dollars)
- Can opener (7 dollars)
- Kitchen shears (8 dollars)
- Phase 1 total: about 185 dollars
Phase 2: Buy these before you unpack the boxes
- Fire extinguisher (30 dollars)
- Smoke/CO detectors (check if home already has them)
- Trash can with lid (40 dollars)
- Dish drying rack (15 dollars)
- Dish soap and sponges (8 dollars)
- All-purpose cleaner and paper towels (10 dollars)
- Dish towels (6-pack, 12 dollars)
- First aid kit (15 dollars)
- Phase 2 total: about 130 dollars
Phase 3: Add these over your first six months
- Instant-read thermometer (15 dollars)
- Vegetable peeler (6 dollars)
- Tongs (10 dollars)
- Garlic press (8 dollars)
- Whisk (6 dollars)
- Storage containers (20 dollars)
- Phase 3 total: about 65 dollars
Grand total for a fully functional kitchen: under 400 dollars
What NOT to Buy (At Least Not Yet)
These tools are popular but not essential for new homeowners. Skip them until you have cooked for a while and know you need them.
Knife block. Takes up counter space. Use a magnetic strip or in-drawer holder instead.
Electric can opener. Manual is faster, cheaper, and never breaks.
Stand mixer. A wooden spoon and your arm work for almost everything. Buy a stand mixer only if you bake bread weekly.
Air fryer. Your oven and a sheet pan do the same thing. Air fryers are just small convection ovens.
Instant Pot. A pot and a skillet handle most pressure cooker recipes. Buy an Instant Pot only if you cook beans from dry or tough meats often.
Specialty gadgets. Avocado slicers, strawberry stemmers, egg separators, banana hangers — all useless. Your knife and your hands do these jobs.
The best kitchen tool is the one you actually use. Wait until you miss something before you buy it.
FAQ: Quick Answers for New Homeowners
How much should I spend on my first kitchen setup?
Start with 150 to 200 dollars for cooking essentials. Add another 100 to 150 dollars for cleaning and safety items. You can have a fully functional kitchen for under 400 dollars.
What is the most important tool for a beginner cook?
A chef’s knife. You cannot cook effectively without a good knife. Everything else is secondary.
Do I need a toaster?
Not if you have an oven. Your oven broils toast in 2 minutes. If you toast bread daily, buy a cheap toaster for 15 dollars.
What about a microwave?
If your new home does not have one, buy a basic model. But many new homes come with built-in microwaves. Check before you buy.
Should I buy nonstick or stainless steel pans?
Nonstick for your first skillet — it is more forgiving for beginners. Buy a stainless steel pot (nonstick pots are unnecessary and wear out faster).
How do I know if my smoke detector works?
Press the test button. You should hear a loud, beeping alarm. Test it monthly.
Where should I store my fire extinguisher?
Mount it near the kitchen entrance, not under the sink or right next to the stove. If a fire starts on your stovetop, you will not be able to reach under the sink.
What is the most forgotten kitchen essential?
A can opener. You will not realize you do not have one until you are standing in front of an unopened can of beans with a knife and a prayer.
The Bottom Line
Setting up your first kitchen as a new homeowner is exciting and overwhelming. You do not need to buy everything at once. Start with the 12 cooking essentials and the safety items. Cook for a month. Notice what you actually use and what you wish you had. Add tools slowly.
Remember that your grandmother cooked for decades with a knife, a pan, and a pot. You can too. The gadgets are nice, but they are not the point. The point is the food, the people you share it with, and the home you are building.
Welcome home. Now go cook something.
Which kitchen tool was your best first purchase? Share your thoughts in the comments.
References: