How to Remove Grease From Kitchen Walls Using Kitchen Grease Cleaning System: Complete Wall Degreasing Guide
You run your finger along the wall above your stove, and it comes back covered in a sticky, yellow-brown film that smells like every fried meal you have made in the past year.
TL;DR: Grease on kitchen walls comes from cooking oil particles that float up and stick to vertical surfaces. A kitchen grease cleaning system for walls uses a degreasing solution (vinegar, dish soap, and warm water), letting it sit for 5 to 10 minutes, then wiping clean with a microfiber cloth. For heavy buildup, use a baking soda paste and a scrub sponge. Painted walls need gentle cleaning to avoid removing paint. Tile walls can handle stronger scrubbing. Clean walls every three months to prevent permanent staining.
🔵 Key Takeaways
- Grease on walls is sticky and traps dust, creating a yellow-brown film that smells rancid.
- The worst grease buildup is always on the wall directly behind and above the stove.
- A simple degreaser of vinegar, dish soap, and water works better than most store-bought sprays.
- Baking soda paste removes baked-on grease without scratching most surfaces.
- Painted drywall needs gentle cleaning — too much scrubbing removes the paint.
- Tile, glass, and metal backsplashes can handle stronger degreasers and more scrubbing.
The Real Causes of Greasy Kitchen Walls and How a Grease Cleaning System Fixes Them
Your kitchen walls are not supposed to be sticky. But if you cook with oil regularly, grease particles float up from your pans and settle on every surface — including your walls. At first, you cannot see it. Then you notice a slight yellow tint above your stove. Then it becomes sticky. Then it starts to smell.
That sticky film is a mixture of cooking oil, dust, and sometimes nicotine or candle soot. It smells because the oil goes rancid over time. Rancid oil releases chemicals that smell like stale french fries and old crayons.
A kitchen grease cleaning system is a repeatable process that removes this film from your walls without damaging the paint or tile.
Why Walls Above the Stove Get the Worst Grease Buildup
Heat rises. When you cook, hot air carries grease particles straight up. They hit the wall above your stove and cool down. The grease sticks. Over months and years, layer after layer builds up. If you have a weak or broken exhaust fan, the buildup happens even faster.
The same thing happens on your ceiling directly above the stove. Most people never clean their kitchen ceiling, so that grease just sits there, getting thicker and smellier.
“The wall behind your stove is the most neglected surface in most kitchens. A once-a-season cleaning removes years of built-up grease and eliminates that stale cooking smell.”
Step-by-Step Guide: Remove Grease From Kitchen Walls
Follow these steps in order. Test your cleaning solution on a small, hidden spot first to make sure it does not damage your paint or tile.
Step 1: Identify Your Wall Type
Different walls need different cleaning methods.
Painted drywall or plaster. Most common. Needs gentle cleaning. Avoid excessive scrubbing or harsh chemicals. Do not soak the wall — too much water damages drywall.
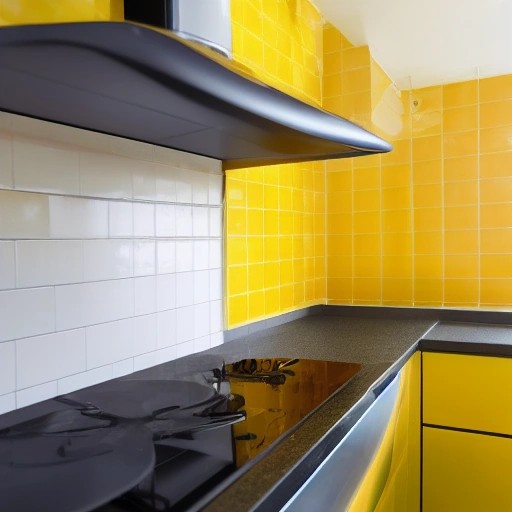
Tile backsplash. Very durable. Can handle stronger degreasers and scrubbing. Grout lines may need extra attention with a toothbrush.
Glass or metal backsplash. Very easy to clean. Can handle most degreasers. Avoid abrasive scrubbers that could scratch.
Wallpaper. Difficult. Grease ruins wallpaper. You may need to replace it. Try a very gentle degreaser and blot, do not scrub.
Unpainted brick or stone. Porous. Grease soaks in. Needs a special stone degreaser. Test on a hidden spot first.
If you are not sure what your wall is made of, start with the gentlest method and test in a corner behind the refrigerator.
Step 2: Gather Your Grease Cleaning System Supplies
You need:
- White vinegar
- Dish soap (blue Dawn or similar degreasing soap)
- Warm water
- Spray bottle
- Baking soda
- Microfiber cloths (at least 3)
- Soft sponge or non-abrasive scrubber
- Old toothbrush (for corners and edges)
- Step stool or ladder (for high walls)
- Drop cloth or old towel (to protect your stovetop and floor)
For heavy grease, you may also want:
- Plastic scraper or old credit card (for thick buildup)
- Rubber gloves
- Degreasing wipes for quick maintenance between deep cleans
Safety reminder: Wear rubber gloves if you have sensitive skin. Open a window for ventilation. Turn off your stove and let it cool completely before you start.
Step 3: Protect Your Stovetop and Floor
Lay down a drop cloth or old towel over your stovetop and the floor directly below the wall you are cleaning. Cleaning solution will drip. You do not want degreaser on your burners or slippery floors.
Remove anything from your stovetop — pans, grates, burner caps. Move small appliances away from the cleaning area.
Step 4: Make Your Degreasing Solution
Mix in a spray bottle:
- 2 cups warm water
- 1 cup white vinegar
- 1 tablespoon dish soap
Shake gently to combine. Do not shake hard — dish soap creates too many bubbles.
This solution breaks down grease on contact. The vinegar cuts through oil. The dish soap lifts it off the wall. The warm water helps it dissolve.
For extra degreasing power, add 1/4 cup of rubbing alcohol. Test on a hidden spot first — alcohol can damage some painted surfaces.
Step 5: Spray and Let It Sit
Spray the degreasing solution generously onto the greasy wall. Do not soak the wall — just get it wet. Let it sit for 5 to 10 minutes. This is the most important step. The solution needs time to break down the grease.
For thick, baked-on grease, let it sit for 15 minutes. If the solution starts to dry, spray again.
Do not let the solution run down into electrical outlets or light switches. If you have outlets on the wall, spray around them carefully or cover them with painter’s tape.
Step 6: Wipe With a Microfiber Cloth
After the solution has sat, wipe the wall with a clean, damp microfiber cloth. Use firm but gentle pressure. Wipe in one direction, not circular motions. You will see yellow-brown grease transfer onto the cloth.
Rinse the cloth frequently in warm water. Wring it out. Continue wiping until the cloth comes away clean.
For heavy buildup, use a soft sponge or non-abrasive scrubber. Scrub gently. If you see paint coming off on the sponge, stop — you are scrubbing too hard.
Step 7: Use Baking Soda Paste for Stubborn Grease
If grease remains after wiping, make a paste with baking soda and a few drops of water. Apply the paste to the greasy spots. Let it sit for 5 minutes. Scrub gently with a damp sponge. Wipe clean with a damp cloth.
Baking soda is mildly abrasive. It scrubs away grease without scratching most surfaces. Do not use baking soda on high-gloss paint — it can leave tiny scratches that show in the light.
For tile grout, dip an old toothbrush in the baking soda paste. Scrub the grout lines. Wipe with a damp cloth.
Step 8: Rinse and Dry
After all grease is removed, wipe the wall again with a cloth dipped in clean warm water. This removes any remaining soap or vinegar residue.
Dry the wall with a clean, dry microfiber cloth. Do not leave the wall wet — moisture can damage drywall or cause mold.
Step 9: Clean the Ceiling Above the Stove
Do not forget the ceiling. Grease rises straight up and settles on the ceiling above your stove.
Use the same degreasing solution. Spray a small section at a time. Wipe with a microfiber cloth on a mop or long-handled duster. For high ceilings, use a step stool safely.
Ceiling grease is often thinner than wall grease because it is farther from the heat source. One or two wipes may be enough.
Comparison Table: Wall Grease Removal Methods
| Method | Best For | Effectiveness | Wall Safety | Effort Level |
|---|---|---|---|---|
| Vinegar + dish soap spray | Light to medium grease | High (90%) | Very safe on paint | Easy |
| Baking soda paste | Stubborn, baked-on grease | Very High (95%) | Safe on most (test first) | Medium |
| Commercial degreaser spray | Heavy restaurant-style grease | Very High (95%) | Can damage some paint | Easy |
| Magic eraser | Small spots, light grease | Medium (70%) | Can remove gloss from paint | Easy |
| Steamer | Thick, layered grease | High (90%) | Safe on tile, risky on drywall | Medium |
| TSP (trisodium phosphate) | Extreme grease before painting | Very High (98%) | Damages paint, for bare walls only | Hard |
Grease Buildup by Wall Location
How to Prevent Grease Buildup on Kitchen Walls
Stopping grease before it hits your walls is much easier than scrubbing it off. These habits take almost no time.
Use a splatter guard. This mesh screen over your frying pan catches 90 percent of oil droplets before they fly onto your walls. Costs 10 dollars. Saves hours of cleaning.
Turn on your exhaust fan. Run it before you start heating oil. Leave it running for 20 minutes after cooking. A good exhaust fan removes airborne grease before it settles.
Wipe walls weekly. Take a damp microfiber cloth and wipe the wall behind your stove every week. Grease is much easier to remove when it is fresh.
Install a backsplash. If you have painted drywall behind your stove, consider adding a tile, glass, or metal backsplash. These surfaces are much easier to clean than paint.
Cook at lower temperatures. When oil smokes, it releases more airborne grease. Keep your oil between 350°F and 375°F. Use a kitchen thermometer.
Clean your range hood filter monthly. A dirty filter lets grease escape into your kitchen instead of trapping it.
Special Tips for Different Wall Types
Painted Drywall
Use the gentlest method. Spray the vinegar solution lightly. Do not soak. Let it sit for only 5 minutes. Wipe gently. If paint comes off on your cloth, stop immediately. You may need to repaint the wall instead of cleaning it.
For flat or matte paint, try a dry sponge first. These sponges absorb grease without liquid. If that does not work, use a very light mist of degreaser.
Tile Backsplash
Tile is easy. Spray generously. Let sit for 10 minutes. Scrub with a sponge. For grout lines, use an old toothbrush with baking soda paste. Rinse with clean water. Dry with a cloth.
Seal your grout once a year. Sealed grout repels grease and is much easier to clean.
Glass or Metal Backsplash
Spray, let sit, wipe. That is it. Avoid abrasive scrubbers that could scratch. Use a microfiber cloth or soft sponge. For stubborn spots, use a razor scraper at a shallow angle.
Unpainted Brick or Stone
This is difficult. Grease soaks into porous stone. Do not use vinegar — acid can damage stone. Use a specialty stone degreaser from a hardware store. Apply according to the label. You may need to repeat multiple times.
How to Remove Grease From Kitchen Walls Without Damaging Paint
This is the number one concern for homeowners. Here is how to clean painted walls safely.
Test first. Mix your degreaser. Apply a small amount to a hidden spot — behind the refrigerator or inside a cabinet. Wait 10 minutes. Wipe. Check for paint damage.
Use less water. Drywall absorbs water. Too much water causes bubbling and peeling. Use a damp cloth, not a wet one. Wring out your cloth well before wiping.
Work in small sections. Clean one square foot at a time. Dry immediately with a clean cloth. Do not let water sit on the wall.
Avoid pressure. Let the degreaser do the work. Scrubbing removes paint. Wiping removes grease. If you need to scrub, use a very soft sponge.
Consider repainting. If your walls are very greasy and the paint is already damaged, cleaning may not be enough. You may need to clean, prime with a stain-blocking primer (like Kilz), and repaint.
FAQ: Quick Answers About Greasy Kitchen Walls
How often should I clean grease from kitchen walls?
Every three months for normal cooking. Every month if you deep fry or cook with oil daily. Weekly quick wipes prevent heavy buildup.
What is the best homemade degreaser for kitchen walls?
Mix 2 cups warm water, 1 cup white vinegar, and 1 tablespoon dish soap. It works better than most store-bought sprays.
Can I use bleach on greasy kitchen walls?
No. Bleach does not break down grease. It only whitens. Use vinegar and dish soap instead.
How do I remove grease from painted walls without removing the paint?
Use a gentle degreaser, a soft cloth, and light pressure. Do not soak the wall. Dry immediately. Test on a hidden spot first.
Why does my kitchen wall feel sticky even after cleaning?
You did not remove all the grease. The degreaser may not have sat long enough. Or you need a stronger solution. Try letting it sit for 15 minutes and using a fresh cloth.
Can I use a magic eraser on greasy walls?
Yes, but carefully. Magic erasers are abrasive. They can remove the gloss from paint or leave dull spots. Use only on small areas.
How do I prevent grease from building up on my walls?
Use a splatter guard, run your exhaust fan, wipe walls weekly, and clean your range hood filter monthly.
When to Repaint Instead of Clean
Sometimes cleaning is not enough. If your kitchen walls have any of these signs, consider repainting:
- The paint is peeling or bubbling from moisture or grease damage.
- The wall is stained yellow even after cleaning.
- The grease has soaked through the paint into the drywall.
- You have scrubbed so hard that the paint is gone in spots.
- The wall smells rancid even after a deep clean.
To repaint a greasy kitchen wall:
- Clean as much grease as possible using the method above.
- Sand the wall lightly to rough up the surface.
- Apply a stain-blocking primer (Kilz or Zinsser).
- Apply two coats of kitchen-grade paint (satin or semi-gloss sheen is easiest to clean).
Semi-gloss and satin paints resist grease better than flat or matte paints. If you are repainting, choose a higher sheen for your kitchen walls.
Which kitchen problem do you want solved next? Share your thoughts in the comments.
References: