Small Kitchen Storage & Space Optimization System: Turn Every Inch Into Usable Space
You open a cabinet to grab a mixing bowl, and three lids fall out, the colander tumbles onto your toe, and you cannot even see the baking sheet you know is buried somewhere in the back — all because your small kitchen has more stuff than space.
TL;DR
A small kitchen needs a system, not just more cabinets. The most effective small kitchen storage system uses five strategies: vertical space (walls and cabinet doors), drawer zones (dividers for everything), corner solutions (lazy susans and pull-outs), door-mounted racks, and a strict “one in, one out” rule for appliances. You can double your usable storage without remodeling by adding tension rods under the sink, magnetic strips on walls, stacking shelves inside cabinets, and rolling carts in gaps. The goal is not more storage — it is smarter storage that puts everything within reach.
Key Takeaways
- The average kitchen wastes 40 percent of its storage potential — dead corner space, unused vertical wall space, and empty cabinet doors.
- Vertical space is your best friend. Walls, cabinet doors, and the space between counter and upper cabinets can all hold storage.
- Every drawer needs a zone. Without dividers, drawers become junk pits. With dividers, they become efficient tool stations.
- The “one in, one out” rule prevents overflow. When you buy a new kitchen item, donate or toss an old one.
- Store by frequency of use. Daily items at waist level. Weekly items on lower shelves. Monthly items up high or in harder-to-reach spots.
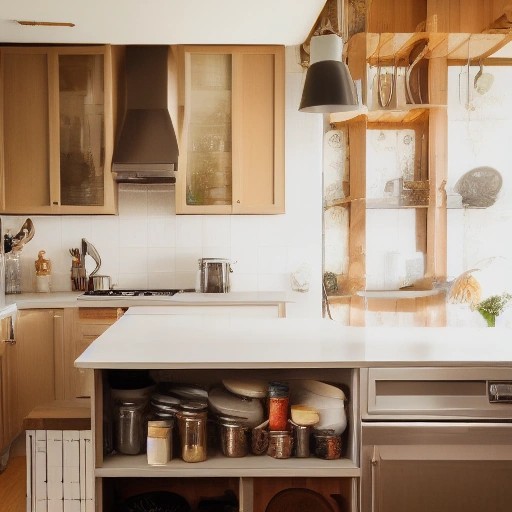
Why Small Kitchens Feel Smaller Than They Are
You have a small kitchen. Every cabinet is full. Every drawer is stuffed. The countertops have three appliances permanently parked on them. And you swear that kitchen was bigger when you moved in.
Here is the truth: your kitchen did not shrink. You just accumulated stuff faster than you created space for it.
The average home cook uses only 20 percent of their kitchen tools regularly. The other 80 percent sit in cabinets, taking up space, getting in the way, and making it harder to find what you actually need.
The solution is not a bigger kitchen. It is a better system.
| Problem | Why It Happens | The System Fix |
|---|---|---|
| Countertops are covered | Small appliances live out permanently | Store appliances in cabinets, rotate as needed |
| Drawers are junk pits | No organization zones | Add adjustable drawer dividers |
| Corners are dead space | Standard shelves waste corner depth | Install lazy susan or pull-out system |
| Cabinet doors are empty | Most people forget they exist | Add door-mounted racks |
| Under-sink is chaos | Pipes make storage awkward | Add tension rods and stackable bins |
| Pantry is overflowing | No “first in, first out” system | Use clear bins and shelf risers |
| Pots and pans are stacked | Stacking makes bottom pans inaccessible | Use pot rack or pegboard |
“A small kitchen does not need a miracle. It needs a system. Every inch of wall, door, and drawer can work for you.”
The Five-Pillar Small Kitchen Storage System
This system works for any kitchen under 150 square feet. Implement all five pillars for maximum effect.
Pillar 1: Vertical Space Optimization
Most people look at their kitchen at eye level. They miss the space above and below.
What to do:
Upper wall space (between counter and upper cabinets):
- Install a magnetic knife strip on the backsplash or wall. Frees an entire drawer.
- Add a pegboard on an empty wall. Hang pots, pans, utensils, and even small shelves.
- Mount a spice rack on the wall. Tiered racks hold more than cabinet shelves.
- Hang a paper towel holder under an upper cabinet (frees counter space).
Above upper cabinets (if there is a gap):
- Use baskets or bins for items you use monthly: holiday platters, roasting pans, specialty bakeware.
- Add wine racks or cookbook stands.
- Never put food up there — heat rises and spoils food faster.
Cabinet doors (inside and sometimes outside):
- Install door-mounted racks for spices, measuring spoons, cutting boards, or foil and wrap.
- Use over-the-door hooks for pot holders, oven mitts, or aprons.
- Add a small trash bin inside a cabinet door for a hidden recycling spot.
Under-sink space:
- Use tension rods to hang spray bottles (cleaners, dish soap).
- Add stackable pull-out bins for sponges, brushes, and scrubbers.
- Install a sliding drawer that fits around the pipes (sold as “under-sink organizer”).
Pillar 2: Drawer Zoning System
A drawer without dividers is a black hole. A drawer with dividers is an efficient machine.
The three-drawer zone system:
| Drawer Location | Zone Type | What Goes Here | Divider Type |
|---|---|---|---|
| Top drawer (waist level) | Utensil zone | Forks, spoons, knives, serving utensils | Adjustable bamboo or plastic |
| Second drawer | Tool zone | Spatulas, tongs, ladles, peelers, whisks | Deep, tall dividers |
| Third drawer | Gadget zone | Measuring cups, zester, garlic press, can opener | Small bins within drawer |
For deep drawers (pot drawers):
- Do not stack pots inside each other. You cannot reach the bottom pot.
- Use vertical dividers so pots stand on their sides like files.
- Store lids on a separate lid rack (vertical or horizontal).
- Label the front of each divider: “large pot,” “medium pot,” “saucepan,” “lids.”
For shallow drawers:
- Use cutlery trays with adjustable compartments.
- Add non-slip liners so items do not slide when opening and closing.
Pillar 3: Corner and Dead Space Solutions
Corners are the most wasted space in any kitchen. Fix them with the right hardware.
Lazy susan (rotating tray):
- Best for corner base cabinets (lower cabinets).
- Two-tier lazy susans double the space.
- Spin to access items at the back.
- Cost: $30-60. Installation: just place inside cabinet.
Pull-out corner system (“magic corner”):
- Two shelves that swing out together when you open the door.
- Brings everything in the corner to you.
- Cost: $200-400. Installation: moderate DIY or professional.
Blind corner pull-out:
- For cabinets where the door is on one side but space extends behind another cabinet.
- A single shelf slides out diagonally.
- Cost: $100-200.
No hardware solution for corners:
- Use lidded bins with handles. Pull the entire bin out, grab what you need, push it back.
- Store one-category items in the corner (only baking sheets, only mixing bowls).
- Use stackable square containers (round containers waste corner space).
Pillar 4: Door-Mounted Storage
Your cabinet doors are blank canvases. Use them.
Inside cabinet doors:
| Rack Type | Best For | Typical Cost |
|---|---|---|
| Spice rack | Spice jars (tiered) | $10-25 |
| Lid rack | Pot and pan lids | $15-30 |
| Wrap organizer | Foil, plastic wrap, wax paper | $10-20 |
| Cutting board rack | 2-3 small boards | $12-18 |
| Utility basket | Sponges, scrubbers, gloves | $8-15 |
| Measuring spoon rack | Magnetic or hook style | $5-10 |
Installation tips:
- Most door racks mount with adhesive hooks or screws (adhesive is fine for light items, screws for heavy items).
- Do not overload — cabinet doors are not designed for heavy weight.
- Make sure the rack does not hit shelves when the door closes.
Outside cabinet doors (for island or exposed cabinets):
- Add towel bars to the outside of base cabinets.
- Hang S-hooks on the towel bars for pot holders or small utensils.
Pillar 5: The One-In, One-Out Rule
This is not a storage product. It is a storage habit. And it is the most important part of the system.
How it works:
Every time you bring a new kitchen item into your home, one old item must leave.
- Buy a new spatula? Donate an old one.
- Get a new baking dish? Toss the cracked one.
- Receive a fancy new appliance? Sell the one it replaces on Facebook Marketplace.
Why it matters:
Small kitchens have finite space. Every new item means something else has to go. No exceptions.
What to do with the outgoing items:
| Condition | What to Do |
|---|---|
| Gently used, still works | Donate to Goodwill, Salvation Army, or Habitat for Humanity ReStore |
| High-value, like new | Sell on Facebook Marketplace, Craigslist, or eBay |
| Worn out, broken, or missing parts | Recycle (metal parts) or trash |
| Never used, still in box | Return for refund (if possible) or regift |
Room-by-Room Optimization (Within Your Kitchen)
Under-Sink Cabinet
The most frustrating space because of the pipes. Here is exactly how to organize it.
Step-by-step:
- Remove everything. Clean the cabinet floor and walls with vinegar.
- Measure the space. Note where pipes are.
- Install tension rods vertically on the left and right sides. Hang spray bottles from these rods.
- Add a sliding basket that fits around the pipes (search “under-sink organizer” — they are U-shaped to fit around plumbing).
- Use stackable bins on one side for sponges, gloves, brushes.
- Store trash bags in a small hanging bin on the cabinet door.
What NOT to store under sink:
- Food (pests love dark, warm spaces under sinks)
- Paper products (moisture leaks can ruin them)
- Anything you need daily (too hard to access around pipes)
Refrigerator Top
The top of your fridge is not a shelf. It is a dust collector and heat trap.
What you CAN store on top of the fridge:
- Large, lightweight items you use once a month or less
- Holiday platters
- Large roasting pans
- Coolers (empty)
What NOT to store on top of the fridge:
- Food (heat from the fridge spoils it faster)
- Paper goods (heat dries them out, but also fire hazard near fridge compressors)
- Heavy items (fridge tops are not designed for heavy weight)
- Anything you need daily (you will not want to reach up there)
Better solution: Add a slim rolling cart next to the fridge instead of using the top.
Inside the Refrigerator
Organization inside your fridge keeps food fresh longer and prevents waste.
The zone system:
| Zone | Location | Store Here |
|---|---|---|
| Top shelf | Eye level | Leftovers, drinks, ready-to-eat foods |
| Middle shelves | Waist level | Dairy, eggs, condiments |
| Bottom shelf | Knee level | Raw meat (on a tray to catch drips) |
| Crisper drawers | Low | Vegetables (high humidity) and fruits (low humidity) |
| Door shelves | Warmest zone | Condiments, juices (NOT milk or eggs) |
Use clear bins inside the fridge to group items. Label bins: “Lunch,” “Snacks,” “Produce,” “Cheese.”
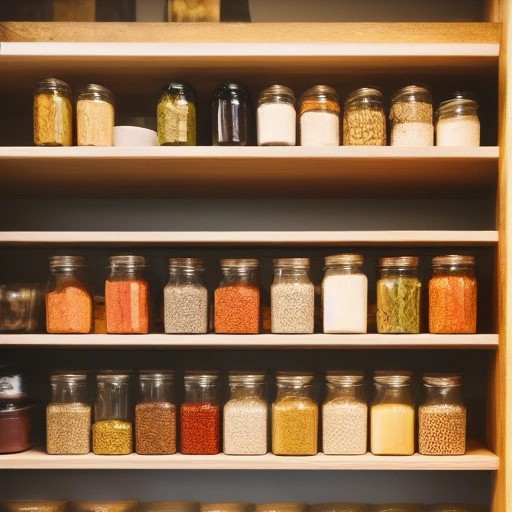
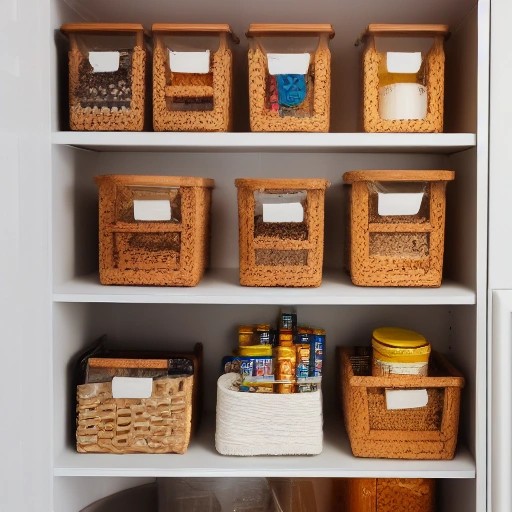
Pantry (or Pantry Closet)
Your pantry should work like a grocery store: easy to see, easy to reach.
The system:
- Remove everything from the pantry. Check expiration dates. Toss anything expired.
- Group by category: canned goods, pasta/rice, baking, snacks, oils/vinegars, breakfast.
- Use clear bins for each category. Label the bin front.
- Install shelf risers (tiered shelves) so you can see what is in the back.
- Use can racks for canned goods (slanted shelves that roll cans forward).
- Store heaviest items on bottom shelves (cans, jars). Light items up top (cereal, chips).
- First in, first out — move older items to the front when you shop.
Product Recommendations (By Budget)
Under $10 Fixes
| Product | Purpose | Where to Use |
|---|---|---|
| Tension rod | Hang spray bottles | Under sink |
| Drawer dividers (adjustable) | Create drawer zones | Any drawer |
| Shelf riser | Double shelf space | Pantry or cabinets |
| Adhesive hooks | Hang utensils, pot holders | Cabinet doors, walls |
| Magnetic strip | Hold knives | Wall or backsplash |
$10-$25 Fixes
| Product | Purpose | Where to Use |
|---|---|---|
| Lazy susan (single tier) | Access corner items | Corner cabinet |
| Door-mounted spice rack | Use cabinet door space | Inside cabinet door |
| Under-sink organizer (U-shaped) | Fit around pipes | Under sink |
| Pot lid rack | Store lids vertically | Cabinet or drawer |
| Over-the-door hooks | Hang aprons, oven mitts | Cabinet or pantry door |
| Stackable bins | Group items | Pantry or cabinets |
$25-$50 Fixes
| Product | Purpose | Where to Use |
|---|---|---|
| Two-tier lazy susan | Double corner space | Corner cabinet |
| Pull-out cabinet drawer | Turn deep cabinet into drawers | Lower cabinets |
| Rolling cart (slim) | Add portable storage | Gap between fridge and counter |
| Pegboard with hooks | Custom wall storage | Empty wall |
| Drawer organizer system (full set) | Complete drawer makeover | Multiple drawers |
$50-$150 Fixes
| Product | Purpose | Where to Use |
|---|---|---|
| Pull-out trash can system | Hide trash in cabinet | Under sink or base cabinet |
| Cabinet door trash bin | Recycling hidden | Inside cabinet door |
| Pot rack (ceiling mounted) | Free cabinet space | Ceiling over island or stove |
| Drawer pegboard system | Customizable tool storage | Deep drawer |
| Corner pull-out shelf (single) | Access blind corner | Blind corner cabinet |
The 30-Minute Kitchen Storage Makeover
Do not have time for a full reorganization? Do this 30-minute version. It will change how your kitchen feels.
Minutes 0-5: Clear the countertops. Everything off except one small appliance (coffee maker or toaster). Put everything else in cabinets or drawers.
Minutes 5-10: Open the junk drawer. Dump it out. Throw away anything broken or that has no home. Put back only items you use weekly. Move everything else to a “maybe” box.
Minutes 10-15: Attack the under-sink cabinet. Remove everything. Throw away old sponges, empty bottles, and mystery items. Use a tension rod to hang spray bottles.
Minutes 15-20: Install a lazy susan in a corner cabinet (if you have one). Place it in and spin it.
Minutes 20-25: Add shelf risers to one pantry shelf. See how much more space you have.
Minutes 25-30: Wipe down all cleared surfaces. Step back and admire your work.
The 7-Day Small Kitchen Reset
For a complete transformation, follow this 7-day plan.
| Day | Task | Time Needed |
|---|---|---|
| Day 1 | Remove everything from countertops. Donate or store all but one appliance. | 20 min |
| Day 2 | Empty and organize every drawer using dividers or bins. | 45 min |
| Day 3 | Empty and organize upper cabinets. Use shelf risers. Store by frequency of use. | 1 hour |
| Day 4 | Empty and organize lower cabinets. Add lazy susans or pull-outs to corners. | 1 hour |
| Day 5 | Organize under-sink cabinet with tension rods and U-shaped organizers. | 30 min |
| Day 6 | Organize pantry. Remove everything, check expiration dates, use clear bins and shelf risers. | 1 hour |
| Day 7 | Install door-mounted racks and wall storage (magnetic strips, pegboard). | 1 hour |
FAQ: Small Kitchen Storage Questions
How do I store pots and pans in a small kitchen without a pot rack?
Use vertical dividers inside a deep drawer. Pots stand on their sides like files. Store lids on a separate rack inside the same drawer or on a cabinet door. If you do not have a deep drawer, use a cabinet shelf with a tiered shelf riser — place large pot on bottom, small pot on top.
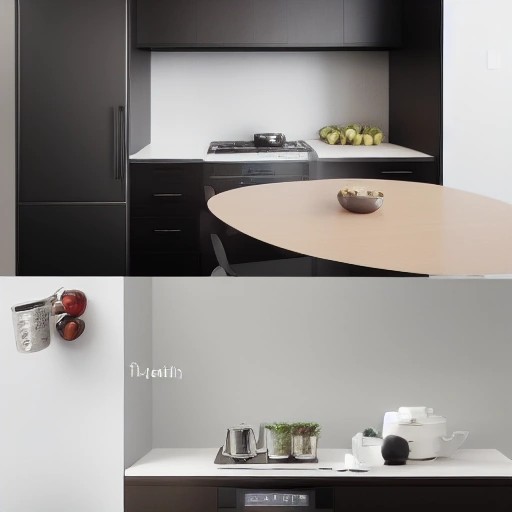
What is the best way to organize a tiny kitchen with almost no counter space?
Use a rolling cart as a portable island. Store it against a wall when not in use, roll it out when you need workspace. Also install a drop-leaf table or fold-down counter on a wall. Remove all appliances from counters except one.
How do I store spices in a small kitchen?
Three options: (1) door-mounted tiered spice rack inside a cabinet door, (2) magnetic spice tins on a metal sheet mounted on the wall, (3) narrow pull-out spice rack installed between cabinet and fridge (a “spice drawer” that is only 3-4 inches wide).
Should I use open shelving in a small kitchen?
Open shelving makes a kitchen feel larger but requires perfect organization because everything is visible. Use open shelving for beautiful, frequently used items (dishes, glasses, coffee mugs). Do not use it for cluttered items (mismatched Tupperware, food packaging).
How do I organize a deep corner cabinet without buying hardware?
Use lidded bins with handles. Store one category per bin (only baking sheets, only mixing bowls). Pull the whole bin out when you need something. Label the bin front. This is cheaper than hardware and works almost as well.
What is the best way to store cutting boards?
Vertical. Use a file organizer on the counter, a cabinet door rack, or a narrow slot between the fridge and cabinet. Storing cutting boards flat takes up valuable shelf space.
How often should I purge my kitchen of unused items?
Every 6 months. Do it when you change your clocks for daylight saving time. If you have not used an item since the last purge, you never will. Donate or toss it.
Putting It All Together
A small kitchen does not have to feel small. The difference between a cramped kitchen and an efficient kitchen is not square footage — it is a system.
Implement the five pillars: vertical space, drawer zoning, corner solutions, door-mounted storage, and the one-in, one-out rule. Use the 30-minute makeover for immediate relief or the 7-day reset for a complete transformation.
The goal is not to store more things. The goal is to store the right things in the right places so you can find them instantly when you need them.
Start today with one drawer. Just one. Empty it, add dividers, put back only what belongs. Tomorrow, do one cabinet. Within a week, your kitchen will feel twice as large and work twice as well.
Which kitchen problem do you want solved next? Share your thoughts in the comments.
References: