Why Does My Fridge Smell Bad Inside: Complete Kitchen Odor Removal Guide
You open your refrigerator to grab a snack, and that weird, funky smell hits you before the cold air does — even though you just wiped down the shelves last week.
TL;DR: A bad smell inside your fridge almost never comes from one big spill. It comes from many tiny sources: forgotten leftovers, spilled liquids hiding under drawers, old produce in the crisper, and absorbed odors in plastic shelves and door gaskets. The fix is a full empty-and-clean process, followed by open boxes of baking soda that you change every three months. For persistent smells, try crumpled newspaper or activated charcoal. Clean the condenser coils once a year to stop smells before they start.
🔵 Key Takeaways
- The refrigerator door gasket (rubber seal) absorbs food odors and needs regular wiping.
- Plastic shelves and drawers are porous and hold onto smells even after washing.
- Condenser coils underneath or behind the fridge can collect dust that burns and smells bad.
- Baking soda works best when replaced every three months — write the date on the box.
- A full fridge smells less than an empty one because full shelves have less air space for odors to circulate.
The Real Causes of Fridge Smells and How to Fix Them
Your refrigerator is a closed, cold, damp environment. These three things together create the perfect conditions for smells to linger. When food rots, it releases gases. Those gases have nowhere to go inside a closed fridge. Over time, they settle onto every surface: shelves, drawers, walls, and even the rubber door seal.
The most common sources of bad fridge smells are not always obvious. You might not see the small puddle of juice under the vegetable drawer. You might forget the half-eaten container of leftovers pushed to the back of the second shelf. You might not notice the spilled milk that dripped down the inside wall and pooled at the bottom.
The good news is that every fridge smell can be removed with a systematic cleaning process.
Why Plastic Shelves and Drawers Hold Onto Smells
Plastic is slightly porous. Over time, odor molecules work their way into tiny scratches and imperfections on your fridge’s plastic surfaces. This is why you can wipe a shelf with soap and water, but the smell of old onions or spoiled milk seems to come back.
The solution is to let baking soda or activated charcoal sit on the plastic surface for several hours. These materials pull the odors out of the plastic itself, not just off the surface.
“Most fridge smells come from spills you cannot see. Liquid drips under the crisper drawers and sits there for weeks, growing bacteria and releasing odor the whole time.”
Step-by-Step Guide: Remove Bad Smell From Inside Your Fridge
Follow these steps in order. Set aside about two hours for the full process. You will do this deep clean every three to six months.
Step 1: Empty Your Entire Refrigerator
Take everything out. Every jar, bottle, container, and bag. Put perishable items in a cooler with ice packs or in a neighbor’s fridge. As you pull items out, check expiration dates. Throw away anything that is expired or looks questionable. Wipe down each jar and bottle before putting it back later. Condensation and sticky residue on the outside of containers also cause smells.
This is also the perfect time to take inventory of what you actually have. You will probably find expired condiments and forgotten leftovers.
Step 2: Remove and Soak All Removable Parts
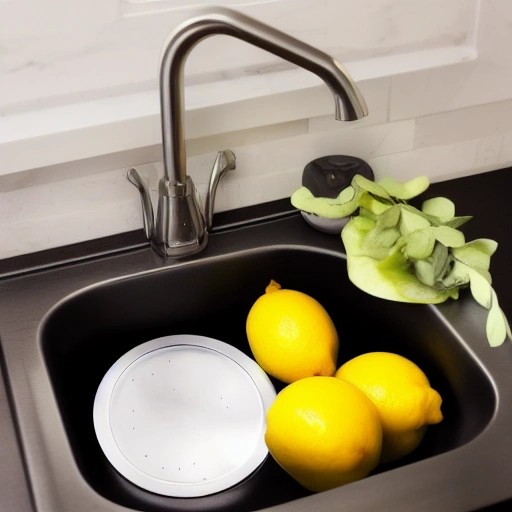
Take out every shelf, drawer, and rack. Also remove the crisper drawers, deli drawer, and any small dividers. Fill your kitchen sink or bathtub with warm water and a few drops of dish soap. Soak all removable parts for 15 to 20 minutes.
While they soak, scrub them with a soft sponge. Do not use abrasive scrubbers on plastic — they create scratches that hold more odors. Rinse with clean water. Set everything aside to air dry completely.
Safety reminder: Never put glass shelves in hot water. Sudden temperature changes can shatter glass. Use warm, not hot, water.
Step 3: Clean the Inside Walls, Floor, and Ceiling
Mix one quart of warm water with two tablespoons of baking soda. Use a soft cloth or sponge to wipe down every interior surface: side walls, back wall, floor, ceiling, and door shelves. Pay special attention to corners and crevices where liquid collects.
For sticky or smelly spots, make a paste with baking soda and a few drops of water. Apply the paste to the spot. Let it sit for 10 minutes. Wipe clean with a damp cloth.
For the rubber door gasket (the seal around the door), wipe it with the baking soda solution. Then wipe again with a cloth dipped in plain water. Dry completely. Mold and food residue collect in the folds of the gasket and cause musty smells.
Step 4: Clean the Condenser Coils
This step is surprising to many people, but dirty condenser coils are a major hidden source of bad smells. The coils are underneath your fridge (behind a front grille) or on the back of the fridge. Dust and pet hair build up on the coils. When the fridge runs, the coils heat up and burn that dust. The burning dust smell travels into the fridge interior.
Unplug your refrigerator. Pull it away from the wall carefully. Locate the coils. Use a coil cleaning brush or a vacuum with a crevice tool to remove all dust. For back coils, gently vacuum or brush them clean. For bottom coils, remove the front grille and vacuum underneath.
Safety reminder: Always unplug appliances before cleaning behind or under them. Do not pinch the power cord when pushing the fridge back.
Step 5: Clean the Drip Pan (If Accessible)
Your refrigerator has a drip pan underneath it that catches water from the defrost cycle. Over months, this water can grow mold and smell musty. Not all drip pans are removable. Check your owner’s manual.
If removable, slide the pan out. Empty any water. Scrub with hot soapy water and a sponge. Dry completely. Slide it back in.
If not removable, pour one cup of white vinegar into the drip pan opening. Let it sit for 30 minutes. The vinegar kills mold without you needing to remove the pan.
Step 6: Reassemble and Restock
Put all dry shelves and drawers back in place. Return your food items. As you restock, follow the “first expired, first out” rule. Move older items to the front. Put newer items in the back.
Do not overpack your fridge. Air needs to circulate to keep temperatures even and prevent odors from getting trapped. Leave small gaps between containers.
Step 7: Place Odor Absorbers Inside
An open box of baking soda is the classic solution for a reason — it works. Place one box on a middle shelf and one box in the crisper drawer. Write the date on each box. Replace every three months.
For stronger or persistent smells, use these alternatives:
- Activated charcoal bags (hang one on a shelf)
- A small bowl of fresh coffee grounds (replace weekly)
- Crumpled black and white newspaper (stuff a few pages on each shelf for 24 hours only)
Do not use scented products inside your fridge. They mix with food odors and create even stranger smells.
Comparison Table: Fridge Odor Removal Methods
| Method | Best For | How Long It Lasts | Effort Level | Cost |
|---|---|---|---|---|
| Baking soda (open box) | General everyday odors | 3 months | Very Easy | Low |
| Activated charcoal bag | Strong, persistent smells | 6 months (rechargeable) | Very Easy | Medium |
| Deep clean with baking soda paste | Plastic-absorbed odors | 3-6 months | High | Low |
| Condenser coil cleaning | Burning dust smells | 1 year | Medium | Free (or low for brush) |
| Crumpled newspaper | Quick 24-hour odor removal | 24 hours | Easy | Free |
| Coffee grounds | Mild odors with coffee scent | 1 week | Easy | Low (or free used grounds) |
Fridge Smell Sources by Percentage
How to Prevent Fridge Smells Before They Start
The best way to answer “why does my fridge smell bad inside” is to stop the smells before they form. These habits take almost no time.
Weekly habits:
- Check for expired or forgotten leftovers every trash day. Toss anything questionable.
- Wipe up spills immediately. Do not wait for the weekly clean.
- Wipe the door gasket with a dry paper towel to remove moisture.
Monthly habits:
- Take out all drawers and wipe underneath them. This is where hidden spills collect.
- Vacuum the front grille to prevent dust buildup on coils.
- Check that all containers are sealed tightly. Loose lids let odors escape.
Every three months:
- Replace baking soda boxes. Write the new date on each box.
- Do a full empty-and-clean deep clean.
Keep an open box of baking soda in your fridge at all times, not just after smells appear. Prevention is easier than removal.
Natural Odor Absorbers for Long-Term Fridge Freshness
You do not need chemical deodorizers. These natural options are safer and often work better.
- Baking soda: Absorbs both acidic and alkaline odors. Use one box per fridge. Replace every three months.
- Activated charcoal: Absorbs a wider range of molecules than baking soda. Recharge monthly by placing in direct sunlight for two hours.
- Oatmeal: A bowl of dry, plain oatmeal absorbs mild odors. Replace every two weeks.
- Vanilla extract: Soak a cotton ball in vanilla extract. Place in a small open container. Replace monthly. The vanilla adds a pleasant scent without masking.
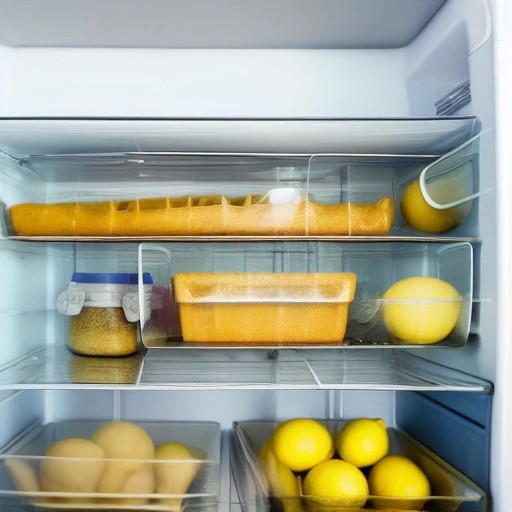
- Lemon: Cut a lemon in half. Place both halves cut-side up on a shelf for 24 hours. Remove after one day — longer can cause mold.
Do not use baking soda and vinegar together inside the fridge. They react and neutralize each other. Use one or the other.
FAQ: Quick Answers to Fridge Smell Questions
Why does my fridge smell bad even after I cleaned it?
You likely missed the condenser coils, the drip pan, or the door gasket. Also check for spilled liquid under the crisper drawers. These hidden spots hold odor sources.
How often should I replace baking soda in my fridge?
Every three months. Write the replacement date on the box with a marker so you remember.
Can I use lemon or coffee grounds instead of baking soda?
Yes, but they do not last as long. Replace lemon every two days. Replace coffee grounds weekly. Baking soda is still the best long-term option.
Why does my fridge smell like chemicals or plastic?
A new fridge can have a plastic smell for the first few weeks. This is normal and goes away. Clean inside with baking soda solution to speed up the process.
What does it mean if my fridge smells like rotten eggs?
A rotten egg smell can mean spoiled food. But it can also mean a refrigerant leak. If you have cleaned everything and the smell remains, call a repair technician.
How do I remove onion or garlic smell from my fridge?
Place a bowl of activated charcoal or fresh coffee grounds inside for 24 hours. Then wipe all surfaces with a baking soda paste. Let sit for one hour before wiping clean.
Does a full fridge smell less than an empty one?
Yes. A full fridge has less air space for odors to circulate. The food also helps absorb some odors. But overpacking blocks air flow. Aim for about 75 percent full.
When the Smell Will Not Go Away
If you have done a full deep clean, cleaned the coils, scrubbed the door gasket, and replaced the baking soda, but the smell remains, check these three things.
- A dead mouse inside the fridge insulation. Mice sometimes chew into the insulation layer of older refrigerators. They die inside the walls. The smell is unmistakable: sweet, rotting meat. Unfortunately, this often means buying a new fridge.
- A refrigerant leak. A chemical or rotten egg smell that does not go away could be leaking refrigerant. Call an appliance repair technician immediately. Refrigerant is dangerous to breathe.
- Sewer gas backing up through the icemaker drain line. If your fridge has a water line for an icemaker or water dispenser, the drain line can connect to your home’s plumbing. A dry P-trap can let sewer gas travel up into the fridge. Run the icemaker or dispenser to send water through the line and refill the trap.
Safety reminder: If you smell something like natural gas or chemicals, unplug the refrigerator and open your kitchen windows. Call a repair technician from another room. Do not stand near the fridge while waiting.
Which kitchen problem do you want solved next? Share your thoughts in the comments.
References: