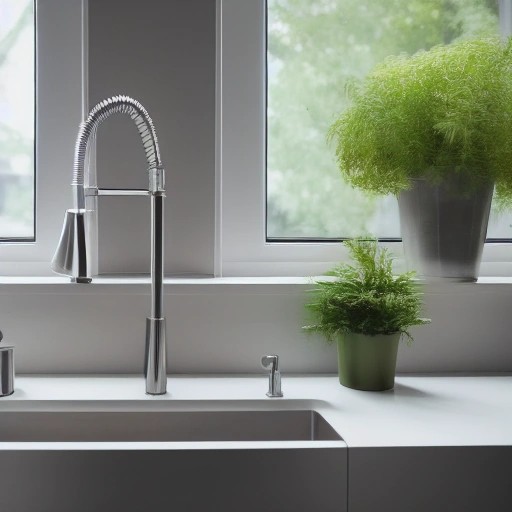
How to Fix a Leaking Kitchen Faucet in Kitchen Sink Problems Guide (DIY Repairs That Work)
Drip. Drip. Drip. You lie in bed at night, and that tiny sound from the kitchen drives you crazy—along with the knowledge that each drop is money going down the drain.
A leaking kitchen faucet is one of the most common and most annoying kitchen sink problems. But here is the good news. Most leaks are easy to fix. You do not need to be a plumber. You do not need expensive tools. You just need to know what type of faucet you have and which part is worn out. This guide walks you through every type of kitchen faucet leak, how to diagnose the problem in thirty seconds, and exactly how to fix it with step-by-step instructions.
TL;DR
A leaking kitchen faucet is almost always caused by a worn-out internal part. A drip from the spout means a bad cartridge or valve stem. A leak around the base means failed O-rings or a loose mounting nut. A leak from the handle means a worn seal or loose packing nut. Most repairs cost under twenty dollars and take less than an hour. You will need basic tools: screwdrivers, pliers, an Allen wrench set, and replacement parts specific to your faucet brand.
Key Takeaways
- Identify the leak location first. Spout, base, or handle. Each has a different fix.
- Turn off the water supply under the sink before doing anything.
- Take photos as you disassemble. They help with reassembly.
- Bring old parts to the hardware store to match replacements.
- A dripping faucet can waste over 3,000 gallons of water per year.
How to Fix a Leaking Kitchen Faucet: Match the Leak to the Fix
Not all leaks are the same. Before you buy any parts or take anything apart, run this simple diagnostic. Turn on the faucet. Turn it off. Watch carefully for thirty seconds.
Leak Type 1: Water drips from the spout after you turn the faucet off.
This is the most common leak. It means the internal cartridge or valve seats are worn out.
Leak Type 2: Water pools around the base of the faucet where it meets the sink.
This means the O-rings or the mounting seal have failed.
Leak Type 3: Water drips from underneath the handle or from the handle itself.
This indicates a worn packing nut or a cracked handle assembly.
Leak Type 4: Water sprays from the pull-out sprayer head or hose.
The sprayer head is loose, cracked, or the hose connection is failing.
Let us fix each one.
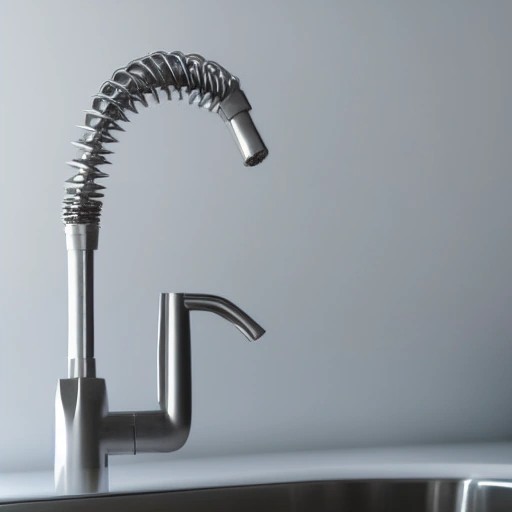
Fix 1: Replace the Faucet Cartridge (Spout Drip)
Most modern kitchen faucets use a cartridge inside the handle to control water flow and temperature. Over time, the rubber seals inside the cartridge wear out. Water seeps past, and you get that endless drip-drip-drip from the spout.
How to know if the cartridge is your problem:
- Water drips from the spout after the faucet is turned completely off.
- The drip slows or stops when you push the handle in a certain direction.
- The faucet handle feels loose, stiff, or gritty when you turn it.
- You have hard water (mineral deposits speed up cartridge wear).
What you will need:
- Phillips and flathead screwdrivers
- Adjustable wrench or pliers
- Allen wrench set (hex keys)
- Replacement cartridge (buy after you remove the old one)
- Plumber’s grease (small tube, $3–5)
Step-by-step fix:
- Safety reminder: Turn off the water supply under the kitchen sink. There are two small valves—one for hot, one for cold. Turn them clockwise until they stop.
- Open the faucet handle to release any remaining water pressure.
- Locate the set screw on the handle. It is often hidden under a small cap or on the back of the handle. Remove the cap with a flathead screwdriver.
- Remove the set screw with an Allen wrench or screwdriver.
- Pull the handle straight up and off the faucet body. If it is stuck, use a handle puller tool (rent or buy for $10–15).
- Under the handle, you will see a metal retaining nut or a large threaded ring. Unscrew it with pliers or a wrench.
- Pull out the cartridge. You may need pliers to grip it firmly.
- Take the old cartridge to the hardware store. Match it by brand (Moen, Delta, Kohler, Pfister, etc.) and shape. Most brands have free replacement cartridges—call their customer service.
- Apply a thin layer of plumber’s grease to the new cartridge’s rubber seals. This helps them slide in without tearing.
- Insert the new cartridge. Make sure it seats fully and aligns with the handle position (hot on left, cold on right).
- Reinstall the retaining nut. Hand-tighten, then a quarter turn with pliers.
- Reattach the handle and set screw.
- Turn the water supply back on slowly. Check for leaks.
“Most faucet brands offer free lifetime cartridges. Call the manufacturer before buying one. Moen and Delta both have excellent warranty programs.”
Fix 2: Replace the O-Rings (Base Leak)
If water pools around the bottom of your faucet where it meets the sink, the leak is coming from inside the faucet body. Water is escaping past worn O-rings—small rubber rings that seal moving parts. This is common on pull-down and pull-out faucets where the spout rotates or swivels.
How to know if O-rings are your problem:
- Water appears at the base of the faucet only when the faucet is running.
- The leak stops when you turn the water off.
- Your faucet swivels left and right or has a pull-down sprayer.
- You see no water coming from the spout or handles.
What you will need:
- Screwdrivers
- Pliers
- Replacement O-rings (buy an assortment kit for $5–10)
- Plumber’s grease
Step-by-step fix:
- Turn off the water supply valves under the sink.
- For a swiveling faucet, you may need to remove the spout. Look for a setscrew on the back or side of the faucet base. Remove it.
- Lift the spout straight up and off the faucet body.
- You will see one or two rubber O-rings on the lower part of the spout or on the faucet body. They may look flattened, cracked, or brittle.
- Pry the old O-rings off gently with a small flathead screwdriver. Do not scratch the metal.
- Slide new O-rings into place. Apply a thin layer of plumber’s grease to help them seal.
- Reinstall the spout. Make sure it seats all the way down.
- Reinstall the setscrew.
- Turn the water back on and test.
| Leak Location | Likely Failed Part | Part Cost | Fix Time |
|---|---|---|---|
| Drip from spout | Cartridge or valve seats | $0–20 | 30 minutes |
| Pooling at base | O-rings or mounting seal | $5–10 | 20 minutes |
| Drip from handle | Packing nut or handle seal | $0–10 | 15 minutes |
| Sprayer leaks | Worn sprayer head or loose hose connection | $10–30 | 10 minutes |
| Leak under sink at supply lines | Worn supply line washers | $2–5 | 10 minutes |
Fix 3: Tighten or Replace the Packing Nut (Handle Leak)
If water drips from underneath the handle itself, the problem is often a loose or worn packing nut. The packing nut is the fitting that seals where the valve stem passes through the faucet body. Over time, it can work loose or the packing material can dry out.
How to know if the packing nut is your problem:
- Water drips from the base of the handle when the faucet is on.
- The drip stops when you tighten the handle nut slightly.
- You have an older two-handle faucet (separate handles for hot and cold).
Step-by-step fix:
- Turn off the water supply valves.
- Remove the handle using the same method as the cartridge replacement (step 3–5 above).
- Under the handle, you will see a hex-shaped packing nut around the valve stem.
- Try tightening the packing nut a quarter turn clockwise with a wrench.
- Turn the water back on and test. If the drip stops, you are done.
- If the drip continues, remove the packing nut completely. You will see soft packing material or a rubber O-ring inside.
- Replace the packing material with Teflon packing string ($3 at hardware store) or replace the O-ring.
- Reinstall the packing nut, then the handle.
- Turn the water on and test.
Fix 4: Tighten or Replace the Sprayer Head
Pull-down and pull-out sprayers take a lot of abuse. They get dropped, twisted, and yanked. Over time, the connection between the sprayer head and the hose can loosen or crack. Water sprays from the head instead of flowing in a clean stream.
How to know if the sprayer is your problem:
- Water sprays from the side or bottom of the sprayer head.
- The sprayer head feels loose when you pull it out.
- Water leaks from the connection where the hose meets the head.
Step-by-step fix:
- Pull the sprayer head out of the faucet body.
- Look at the connection point. There is usually a small brass or plastic nut.
- Try tightening the nut by hand or with pliers. Turn clockwise.
- Test the sprayer. If it still leaks, unscrew the nut completely.
- Inspect the rubber washer inside the connection. If it is cracked or flattened, replace it. Take the old washer to the hardware store for a match.
- Reattach the sprayer head and tighten firmly but not too tight.
- If the sprayer head itself is cracked, you need a replacement. Search online for your faucet brand and model number plus “sprayer head replacement.”
The Tools You Will Need (Basic Kit Under $25)
You do not need a full workshop. These basic tools handle almost every faucet repair.
- Phillips and flathead screwdrivers ($5)
- Adjustable wrench or small pliers ($8)
- Allen wrench set (hex keys) ($6)
- Small flashlight ($5)
- Plumber’s grease ($3)
- Replacement parts specific to your faucet
Nice to have but not required:
- Faucet handle puller ($10–15)
- Basin wrench (for tight spaces under the sink) ($12)
How to Identify Your Faucet Type
Before you buy any parts, you need to know what kind of faucet you have.
Ball faucet: Single handle that moves in a dome shape. Common on older American Standard faucets. Has a rounded cap under the handle.
Cartridge faucet: Single handle that moves left to right and up and down. Most common type today. Found on Moen, Delta, Kohler, and many store brands.
Ceramic disk faucet: Single handle with a wide, flat body. Moves smoothly with very little resistance. Very reliable but expensive to replace.
Compression faucet: Two separate handles (hot and cold). Older style. Each handle tightens down to stop water flow. Washers wear out over time.
Look at your faucet and compare to these descriptions. When in doubt, remove the handle and take a photo of the inside to show the hardware store employee.
When to Replace the Entire Faucet
Sometimes repair is not worth it. If any of these are true, buy a new faucet instead of fixing the old one.
- Your faucet is over 15 years old and replacement parts are hard to find.
- The faucet body itself is cracked (you see water seeping through the metal).
- You have repaired the same leak twice in the past year.
- A new basic faucet costs $60–100. A plumber to repair an old faucet costs $150–200.
How to choose a new kitchen faucet:
- Stick with major brands (Moen, Delta, Kohler) for easy parts availability.
- Choose a cartridge or ceramic disk design. Avoid ball faucets.
- Get a pull-down sprayer if you wash large pots.
- Make sure it fits your sink’s hole configuration (one hole or three holes with a deck plate).
Prevention: Keep Your Faucet Leak-Free
Clean the aerator every six months. Mineral buildup restricts flow and puts strain on internal seals.
Do not overtighten the handle. Forcing the handle too hard when turning off water wears out cartridges faster.
Replace cartridges every five to eight years as preventive maintenance. It is cheaper than waiting for a leak and potential water damage.
Wipe the faucet dry after each use. Standing water around the base can seep into small cracks over time.
FAQ: Leaking Kitchen Faucet Questions Answered
Why does my kitchen faucet leak only when I use the sprayer?
The diverter inside the faucet that switches between spout and sprayer is failing. Replace the diverter cartridge or the entire faucet.
Can a dripping faucet really waste that much water?
Yes. One drip per second wastes over 3,000 gallons per year. That is enough to fill a small swimming pool.
Do I need to turn off the main water supply to fix a faucet?
No. The shutoff valves under the kitchen sink are enough. Only turn off the main supply if those valves do not work.
Why is my faucet leaking after I just fixed it?
You may have damaged a rubber seal during reassembly, or the new cartridge is not seated fully. Take it apart and check each part.
How do I remove a stuck faucet handle?
Spray penetrating oil (like WD-40) into the gap around the handle base. Wait ten minutes. Tap gently with a rubber mallet. Use a handle puller tool if needed.
Can I use Vaseline instead of plumber’s grease?
No. Vaseline degrades rubber seals over time. Plumber’s grease is specifically designed to be safe for rubber and plastic.
Should I call a plumber for a leaking faucet?
Try the DIY fix first. It is one of the easiest home repairs. If you cannot remove the cartridge or the faucet is very old, then call a plumber. Expect to pay $150–250.
Final Thoughts: Silence That Drip Today
A leaking kitchen faucet is not just annoying. It wastes water, raises your bill, and can eventually cause damage to your sink base cabinet. But you do not need to live with it. Identify where the leak is coming from—spout, base, handle, or sprayer. Buy the small, cheap part that has failed. Follow the steps in this kitchen sink problems guide to replace it. In less than one hour and for under twenty dollars, you can have a dry, quiet, perfectly working faucet again.
Have you fixed a leaky kitchen faucet before? What brand do you have? Share your experience in the comments.
References: